Changelog
Here are the latest product updates from EasyRoutes. If you have feedback or suggestions, please reach out — we'd love to hear from you!
Here are the latest product updates from EasyRoutes. If you have feedback or suggestions, please reach out — we'd love to hear from you!
We've made a number of updates across EasyRoutes, improving access to key route details and enhancing data exports.
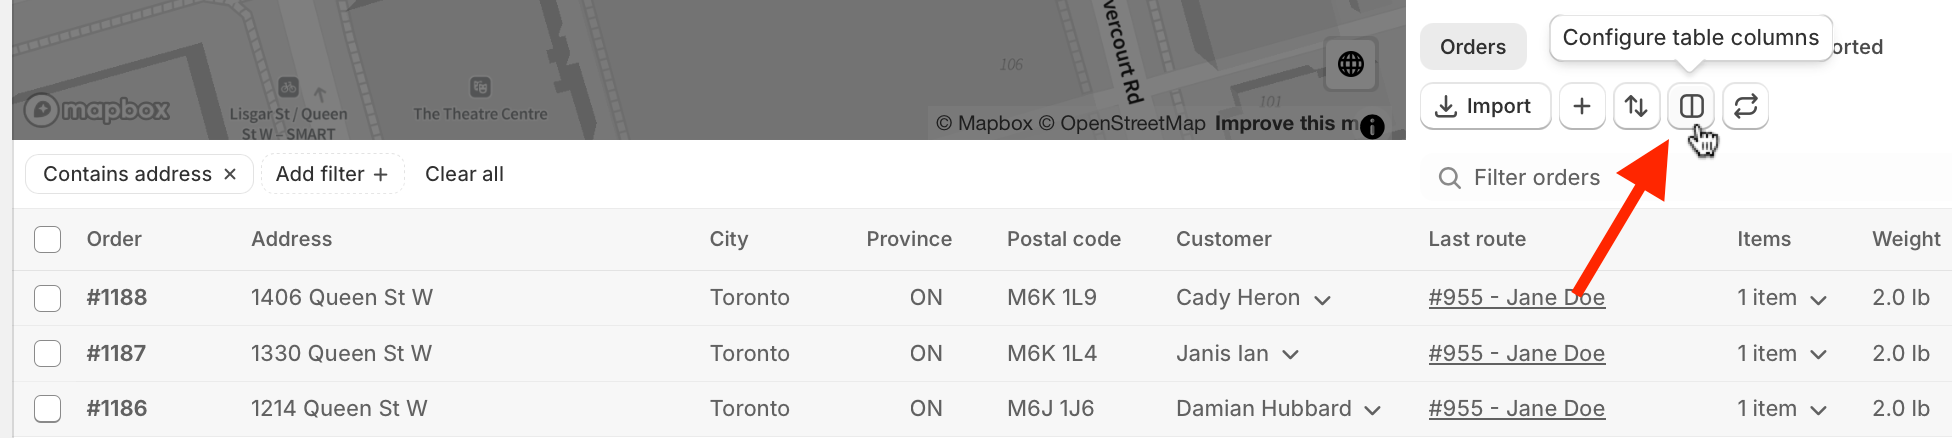
This new column on the EasyRoutes Orders page contains a clickable link with direct access to the last route that any order was added to, where applicable:

The Last route column is enabled by default; to disable it, click the Configure route columns button (highlighted below), and un-select the Last route option from the Customer & Order Details section:
This new option can be applied on the Routes page, and will filter only for routes that were scheduled for the previous calendar date. Apply from the + Add filter menu by selecting the Start date option; enable the Yesterday selector shown below:
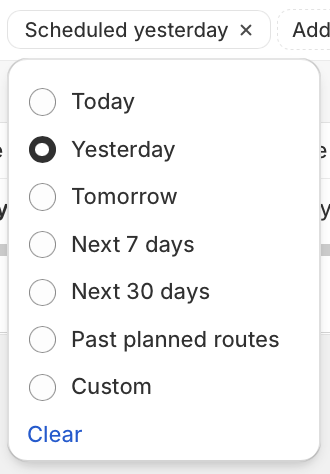
For instant access to the previous day's routes on an ongoing basis, we recommend adding this filter type to a saved Route View.
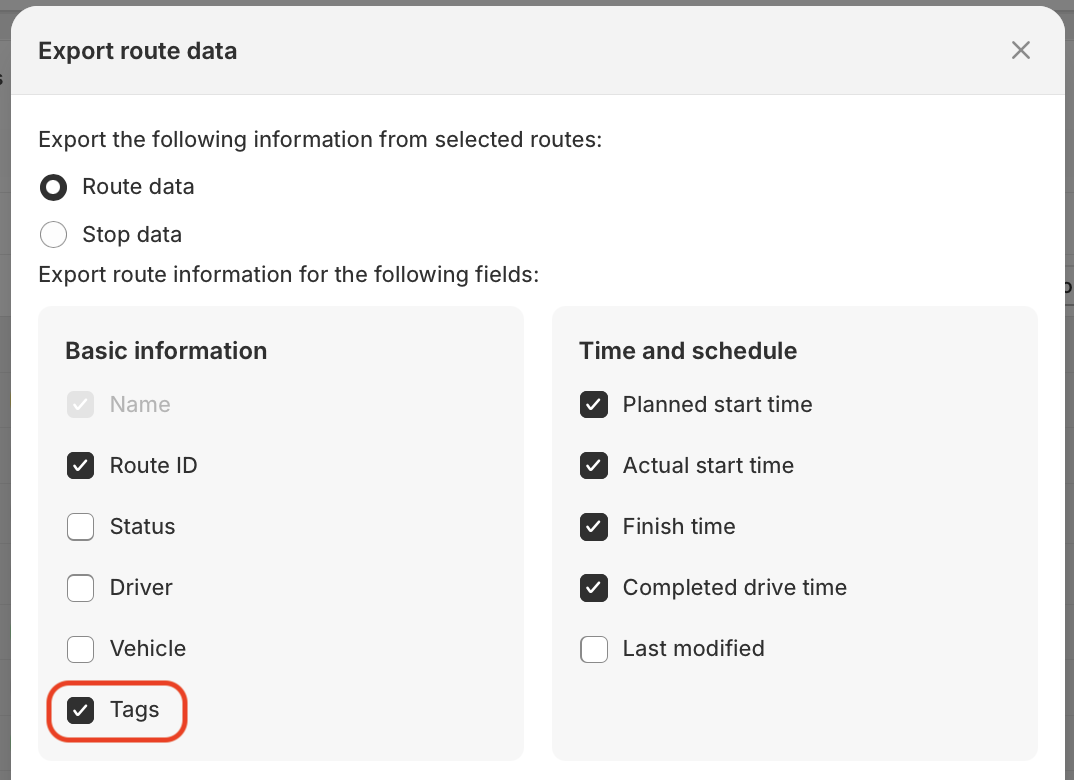
We've added the ability to include route tags in any export of selected routes on the Routes page. When exporting from the Routes page, ensure the Tags option is selected within the Basic information section, as highlighted below:
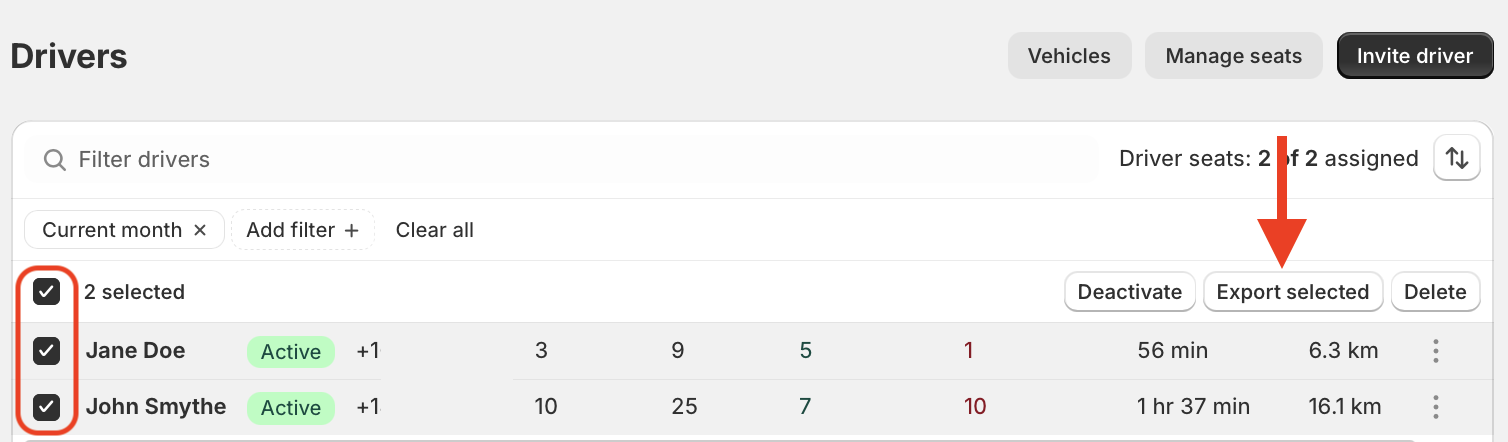
We've also added an export tool to the EasyRoutes Drivers & Vehicles page. Use the checkboxes to select drivers for export, then click the Export selected button highlighted below; choose whether to copy your exported data to the clipboard or download as a CSV file to complete the export. The same steps can be used to export data from the Vehicles section of the same page:
We've added new options for eSignature proof of delivery, allowing users to display these proof items in customer-facing communications in two new locations:
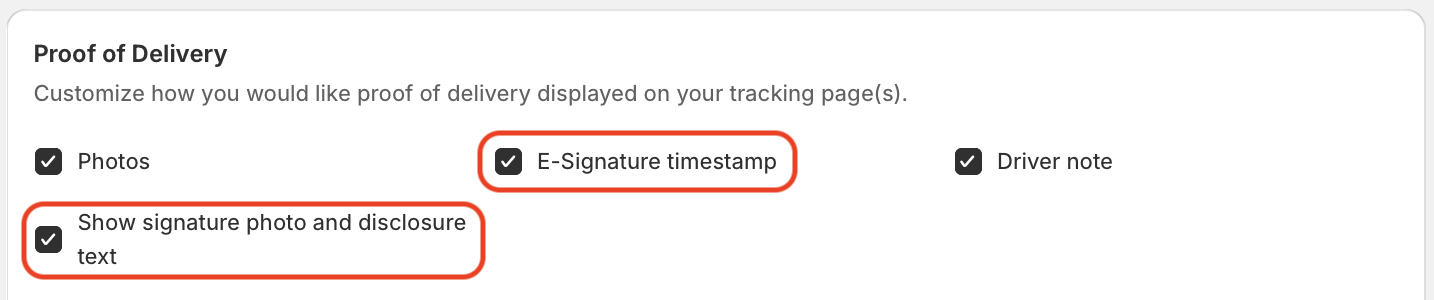
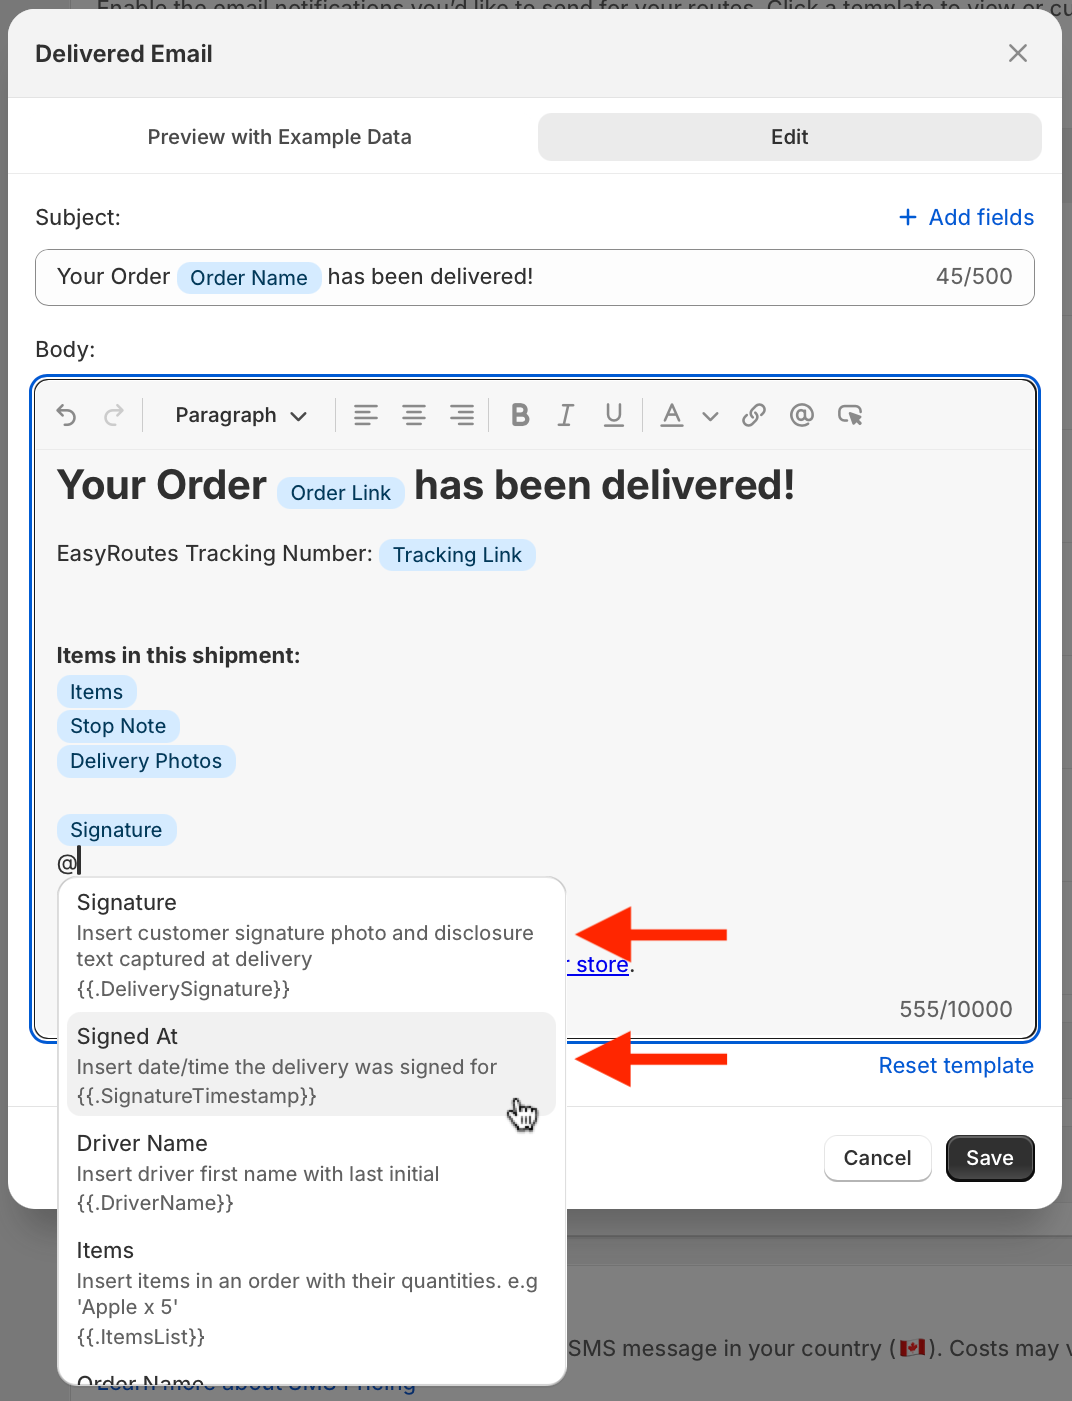
For full details on customizing either of these customer communications, see the support articles for customer notifications and order tracking pages.
We've added a number of new options to EasyRoutes' Update route stop API endpoint, allowing users to specify additional parameters when updating imported stops on an existing route via the API. This endpoint now supports updates to the following:
For full details on updating imported stops on an existing route via the API, review the Update route stop documentation found in the EasyRoutes Developer Docs Portal.
Version 1.0.98 of the EasyRoutes Delivery Driver mobile app is now available to download for iOS and Android devices. This release includes overall performance improvements, as well as adjustments to background location tracking when users have completed any actively tracked routes.
Version 1.0.97 of the EasyRoutes Delivery Driver mobile app is now available to download for iOS and Android devices. This release patches an error affecting a small subset of iOS users when attempting to save eSignature proof of delivery captures; users not affected by this error should not experience any other impact when interacting with the app compared to the previous version.
Version 1.0.96 of the EasyRoutes Delivery Driver mobile app is now available to download for iOS and Android devices. This release features updates to the app's phone number validation library to support a broader range of Australian area codes, as well as further improvements to app logging behaviour and minor bug fixes. Users should not experience any noticeable impact when interacting with the app compared to the previous version.
Version 1.0.94 of the EasyRoutes Delivery Driver mobile app is now available to download for iOS and Android devices. This release features more robust support for logging throughout the mobile app, as well minor bug fixes and performance improvements. Users should not experience any noticeable impact when interacting with the app compared to the previous version.
We've added two new endpoints to interact with your EasyRoutes stops & routes using our native APIs:
We've also consolidated all API reference materials, resources, and code samples into the new EasyRoutes Developer Docs Portal. All current and future documentation on getting started with the API, authentication protocols, and working with our API endpoints & webhooks can now be found here.
Looking for something else in the API? We're always eager to hear about custom solutions using EasyRoutes' APIs - please get in touch with our team and let us know of any additional API functionality that would be useful to your workflows.
Version 1.0.93 of the EasyRoutes Delivery Driver mobile app is now available to download for iOS and Android devices. This release features support for the previously announced start/end location photo upload requirements, as well minor bug fixes and performance improvements.

We've added two new EasyRoutes settings, allowing route planners to require photo uploads for route start and/or end locations - particularly useful for users comparing mileage, vehicle conditions, or total route contents both before and after a route is completed. When enabled, drivers will not be able to start their delivery routes and/or mark routes as completed until configured photo upload requirements are met.
Enable this new behaviour from your EasyRoutes Settings > Driver settings tab, using the two checkboxes in the Driver app settings section highlighted above.
Drivers will also need to update their version of the mobile app to v1.0.93 or above in order for either of these new settings to take effect.
We've introduced several new endpoints to interact with your EasyRoutes stops, routes, and drivers using our native APIs:
For more details on configuring and working with each of these new EasyRoutes API endpoints, refer to the support documentation linked to each of the endpoint titles above.
We've also made some improvements to existing API behaviour, including:
Full details, sample responses, and reference documentation for working with our API can be found in the EasyRoutes Developer Docs Portal.