Learn how EasyRoutes automates customer communications; how to customize and print packing materials; provide delivery ETAs & time windows; and how to keep customers informed in real-time with notifications, tracking pages, and Proof of Delivery.
Welcome to EasyRoutes 101! This article outlines all the ways you can communicate with your customers about their upcoming deliveries with EasyRoutes. We provide a number of different ways to provide customers with up-to-date order information throughout their delivery timeline - in this article, we’ll explore how to configure and make the most of each of the following features:
Packing Slips & Packing Labels
Scheduled ETAs
Time Windows
Email & SMS Notifications
Proof of Delivery
Order Tracking Pages
Read on to find out how to provide an outstanding delivery experience from checkout to doorstep, and reduce order status inquiries by providing all the information your customers need to know upfront.
Packing Slips & Packing Labels
Before any orders even leave your warehouse, EasyRoutes provides packing slips and packing labels that are easy to print and configure to suit your specific delivery requirements.
Navigate to your EasyRoutes Settings > Packing Slips & Labels tab to follow along below. Be sure to click the Save button at the top of the page after making any changes to ensure they're applied!
At the top of the page, you can click the Preview packing slip or Preview packing label buttons to see what either printout will look like under your current configuration:
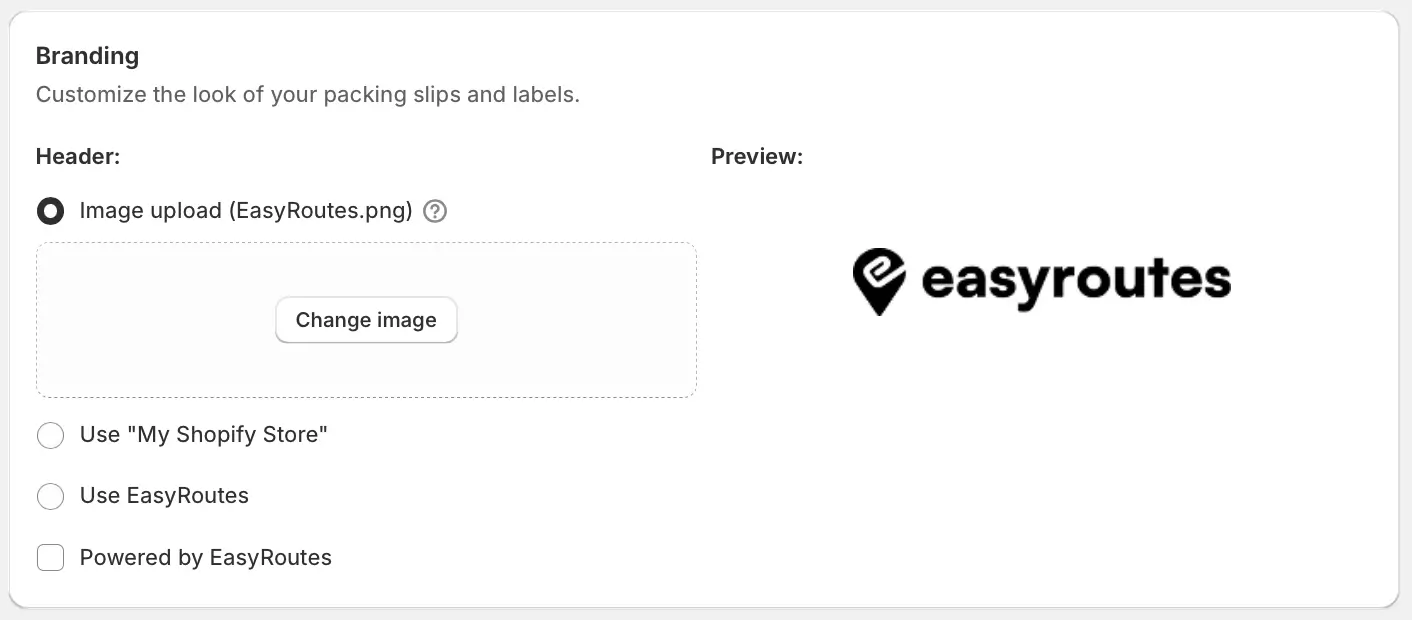
From the Branding section, you can choose to use your store's name on packing slips & labels, or upload an image (i.e. your store's logo) to use instead; if you choose to use an image, you'll see a preview as soon as it's uploaded:
At the bottom of the page, the Packing slip and label text section allows you to customize the labels for 20 different variables on both document types - if you prefer to refer to certain variables by a different name or title, feel free to modify any of these to suit your needs:
Packing Slips
From the Packing slip options section, you can configure the sizing and placement of data on your packing slips, and enable/ disable any data types on your printouts:
Below these, you'll find item-specific variables, and variables related to Order tags and attributes - modify these if your store makes use of any these advanced features:
Packing Labels
Just below your packing slip settings, you'll find all the tools to configure your packing labels in the Packing label options section - adjust sizing as needed, or disable/enable any additional variables you'd like to exclude/include on your packing labels:
Printing Packing Slips & Labels
Access the route you would like to generate packing slips and/or labels for. Click on the Print icon between the map and your stop sequence:
The Print Preview window will open. Use the checkboxes on the right to select Packing slips and/or Packing labels and click Print in the top-right corner to bring up your system Print dialog:
Note: If the preview of your packing slips or labels doesn't look quite right on the Print page, you can click Update packing slip or packing label settings below the checkboxes to jump directly to the Settings pages mentioned above.
Scheduled ETAs
EasyRoutes allows you to schedule a single route or a route group for a date and time in the future for when you want the route to leave your starting location for deliveries. By setting a date and time, EasyRoutes can add Estimated Times of Arrival (ETAs) to each stop that can be shared with your customers (more on this below!). Route Scheduling can be enabled from the Route Options page:
Once you enable Route Scheduling and create a route or route group, you will see a Scheduled for: field at the top of the route page:
When clicked, a drop-down will appear with options to help you select a date, time, and time zone. By default, EasyRoutes uses the same time zone as your Shopify store.
Once you have selected your date and time, click the Save button. The table displaying the list of orders in the route will update to show your new ETAs:
Time Windows
Time windows are a way to specify the time constraints for a delivery stop, and to provide your customers with additional details about their order's expected arrival. For example, a delivery or pickup may need to be made between 9:00 am and 12:00 pm, or between 2:00 pm and 5:00 pm. Time windows can also be open-ended such as 10:00 am or earlier, or 1:00 pm or later.
EasyRoutes can optimize delivery routes with time windows as long as the route has a scheduled start time and date, and one or more stops have a time window associated with them. EasyRoutes also supports multiple third-party date picker apps that can collect preferred time windows from your customers on checkout, and automatically include them in their orders.
Where possible, time windows are automatically parsed from Shopify orders or imported CSV orders. To automatically create a route with time windows from orders:
From your EasyRoutes Orders Page, access the Configure table columns tool found just above your table of orders:
From the modal that appears, ensure the Time window checkbox is selected within the "Order Information" section.
Set a scheduled start time and date using the Route scheduling option described above.
Select and add any orders that have time windows, and click Create route.
The route will be created to minimize overall driving time while meeting the time windows of orders included in the route.
If your orders do not have time windows, you can manually add time windows to a route:
Set a scheduled start time and date on the route as described above.
Edit or add a stop and set a time window. To properly handle delivery routes that cross time zone boundaries (e.g., Chicago travelling towards Indianapolis), the time zone of the time window is based on the address of the stop.
Save changes. You should now see a column of time windows in your local time zone. Stops that are in different time zones will be annotated to indicate their differing time zone.
Re-optimize the route. The route should now minimize overall driving time while meeting the time windows.
Email & SMS Notifications
EasyRoutes can send customers email and/or SMS notifications for any or all of the following events:
Ready for Delivery: Sent manually when the Mark as Ready button is clicked on a route.
Out for Delivery: Sent when your driver starts the delivery route.
Delivered: Sent when an order is marked as Delivered.
Missed Delivery: Sent when an order is marked as Attempted.
Driver is 3 Stops Away: Sent when a driver is three stops away*
Delivery Scheduled - Sent manually using a button (envelope icon) on any Route page; requires that a route have a scheduled start date/time set, and no previous notifications (other than Ready for Delivery) have been sent for this route.
Delivery Rescheduled - Sent manually using a button (envelope icon) on any Route page; requires that a route have a scheduled start date/time set, and no previous notifications (other than Ready for Delivery and/or Out for Delivery) have been sent for this route.
First, from your EasyRoutes Settings > Customer Notifications tab, ensure you've selected to use EasyRoutes notifications in place of Shopify's default notifications:
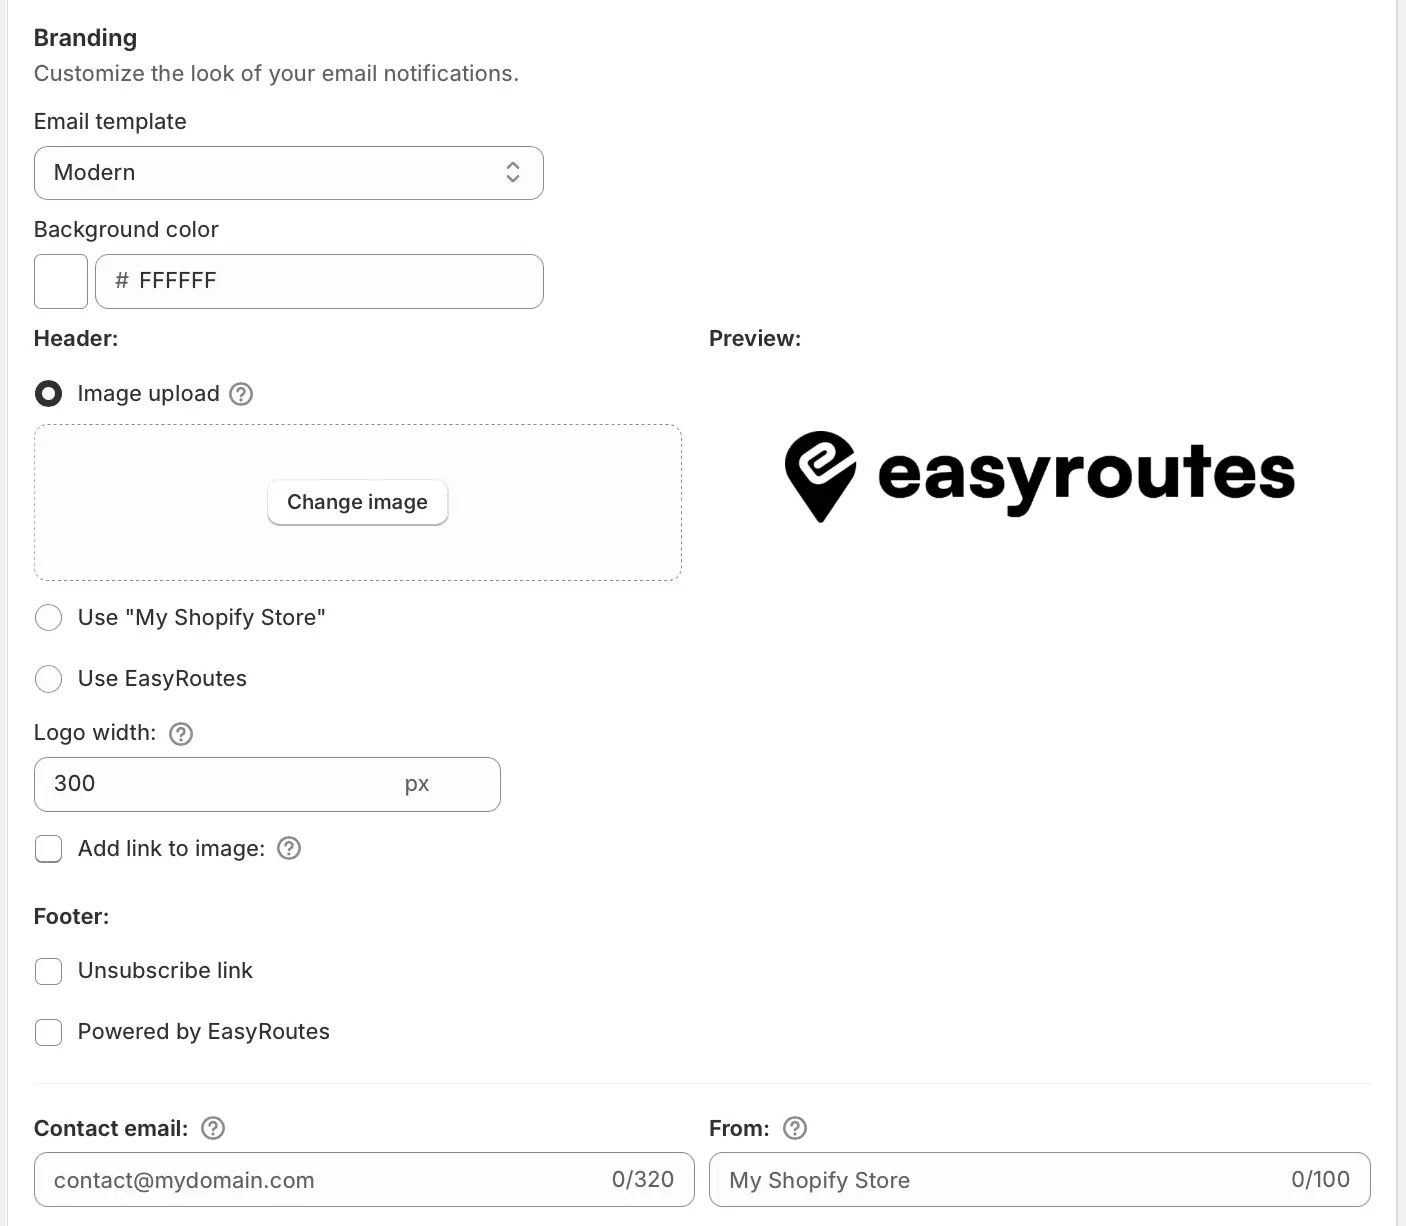
From the Branding section, you can optionally upload an image (i.e. your store's logo) to use instead of your store's name; you can also customize what the logo links to, the maximum logo size, and the email address that will be displayed within the notification and that your customers can reply to:
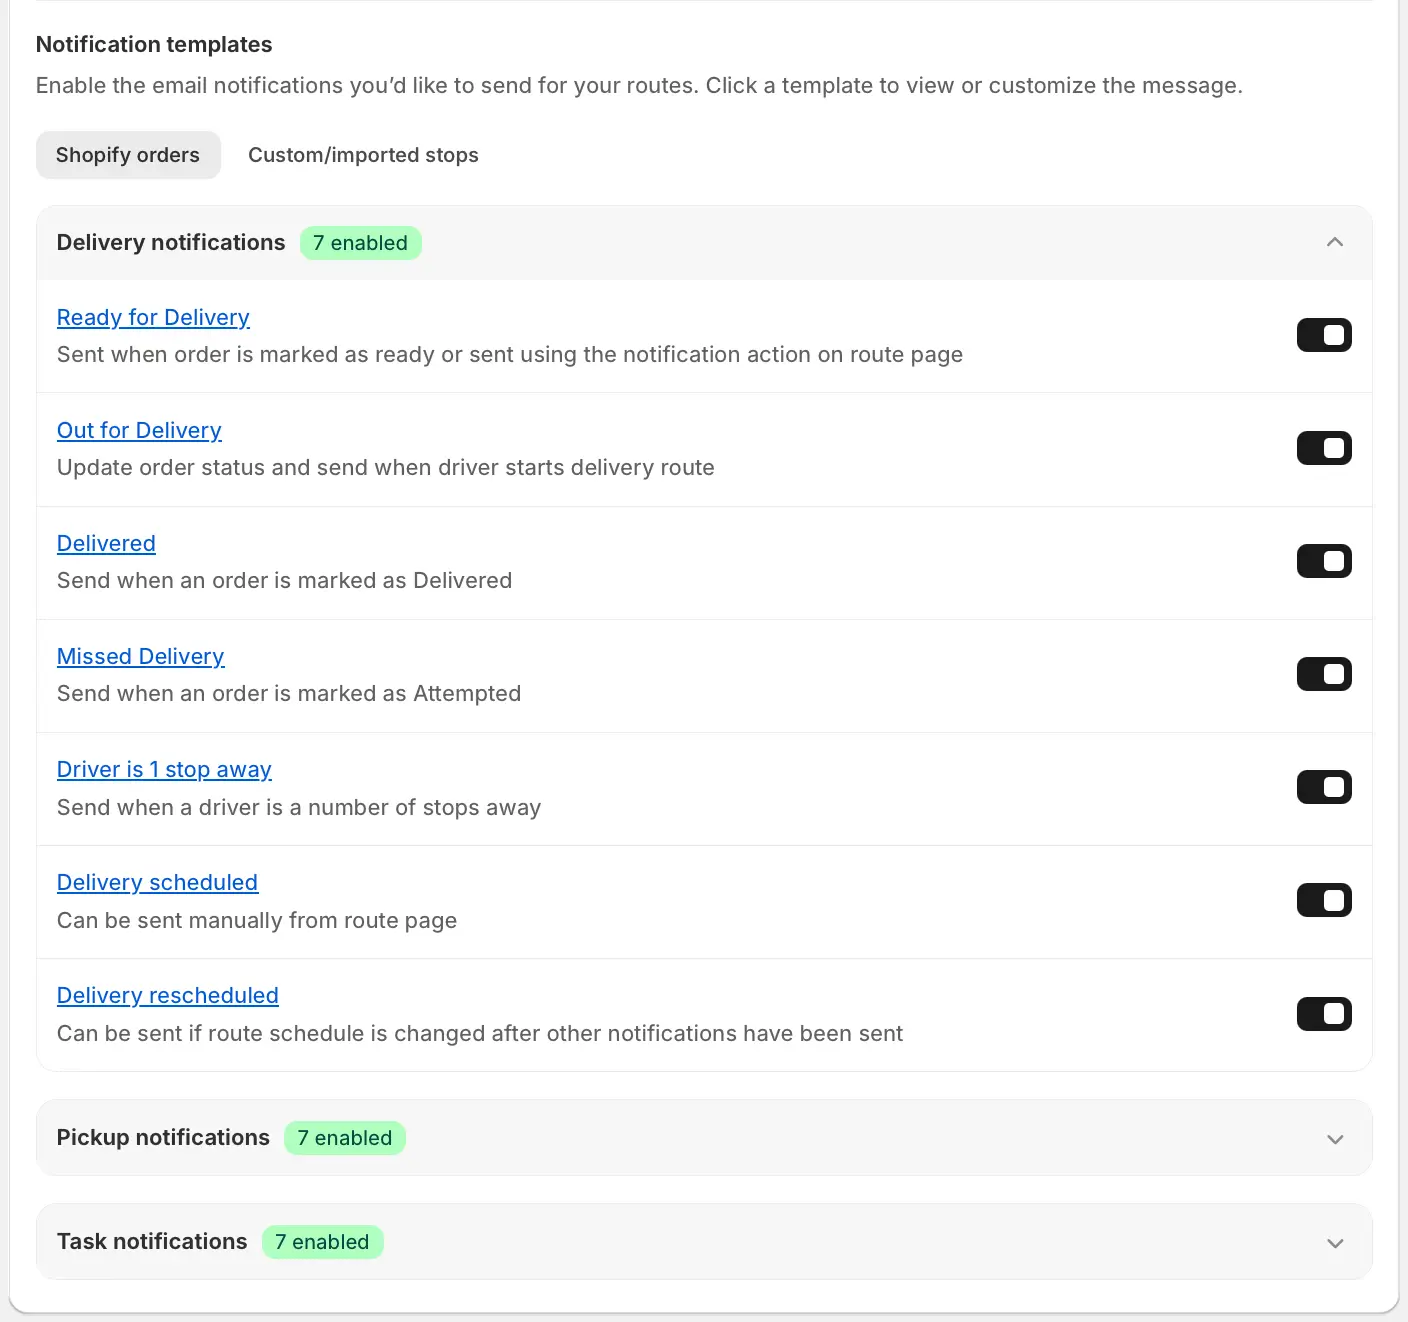
Below this, you'll find the Notification templates settings - use the on/off toggles to enable any notification types you'd like to send to your customers, for both Shopify-native orders, and imported/custom stops using the tabs at the top of the panel; you can also enable and edit a different series of notifications for stops marked as Pickups and/or Tasks by expanding these panels at the bottom of the section:
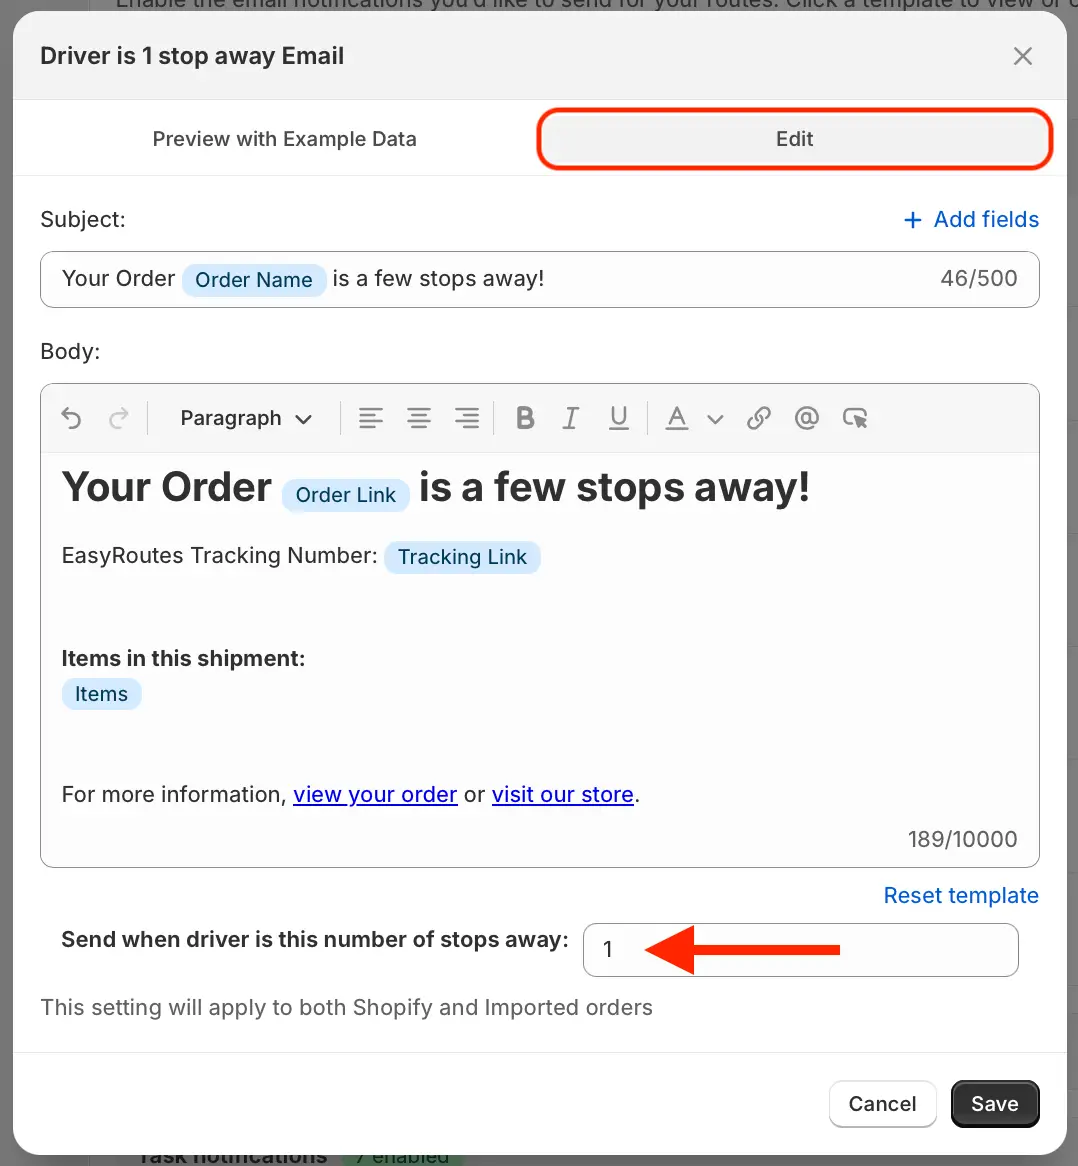
*Note:Driver is 3 Stops Away can be modified to increase/decrease how many stops away a driver must be before triggering the notification. Click the Driver is 3 Stops Away notification title, navigate to the Edit tab, and increase or decrease the Send when driver is this number of stops away setting at the bottom of the page. Click Save to see this change reflected in your notifications list:
You can also click on any of the notification type's titles to Preview what your current notification for that type looks like. Click into the Edit tab to add or remove variables, or input custom text or code to further fine-tune your notifications' content.
Optional: Follow the same steps as above for the SMS notifications section below to customize the look and content of your SMS notification templates, if used. For reference, here's a current list of SMS usage rates for every country in which EasyRoutes SMS notifications are supported; more information on how usage-based SMS notifications work can be found in this support article.
The final section of this Settings page configures whether to include tracking links when sending notifications to your customers - enable one or both of the available checkboxes to include links to tracking pages (lots more on these below!) for orders fulfilled with EasyRoutes and/or for orders fulfilled outside EasyRoutes:
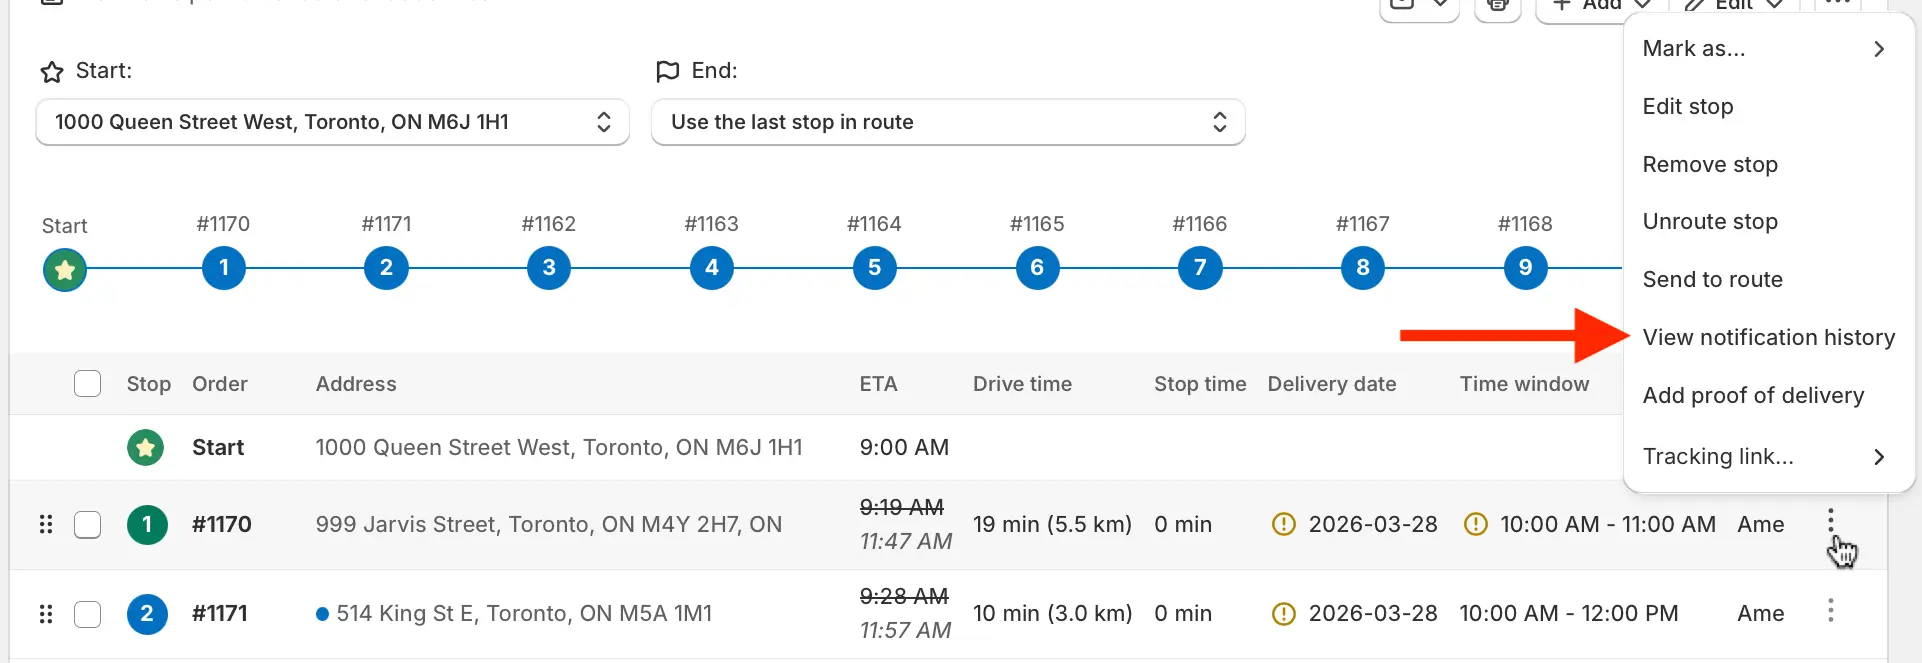
Once orders have been added to a route, you can see a full timeline of what notifications have been sent through EasyRoutes with our Notifications History view. To view the notification timeline, open the Actions menu (three dots icon) next to the stop whose notification history you want to access and click View notification history:
A modal will pop up showing you what notifications have been sent and exactly when they were sent:
Proof of Delivery
EasyRoutes allows up to four Proof of Delivery (PoD) photos, one eSignature, a delivery's GPS location, and a custom note to be added to any stop that corresponds to a Shopify order. For more information on capturing PoD from a driver's perspective, including how to make Proof items required to mark a stop as Delivered, see EasyRoutes 101: Delivery Driver Mobile App.
When viewing a completed route or route in progress, a series of icons under the Proof column on each stop's entry indicates which Proof of Delivery items were captured for that stop:
When any of the following proof of delivery items are attached to a stop, they will display as the icons shown above - click on any available icon to open the PoD panel and view the Proof items:
Photo(s)
eSignature
Driver note
GPS delivery location
Once photos are taken and attached, EasyRoutes provides URLs to the photo(s) that are stored and accessible via an order's attributes (listed under Additional Details for that order):
You can then use these photos in your order delivery notifications. Your drivers can also use just the note feature to attach a note regarding the delivery that can be used for internal purposes, or also shared with your customers. PoD photo URLs are automatically synced to Shopify orders as shown above, but notes and eSignatures can also be automatically synced from your EasyRoutes Settings > General tab, under the Advanced options section:
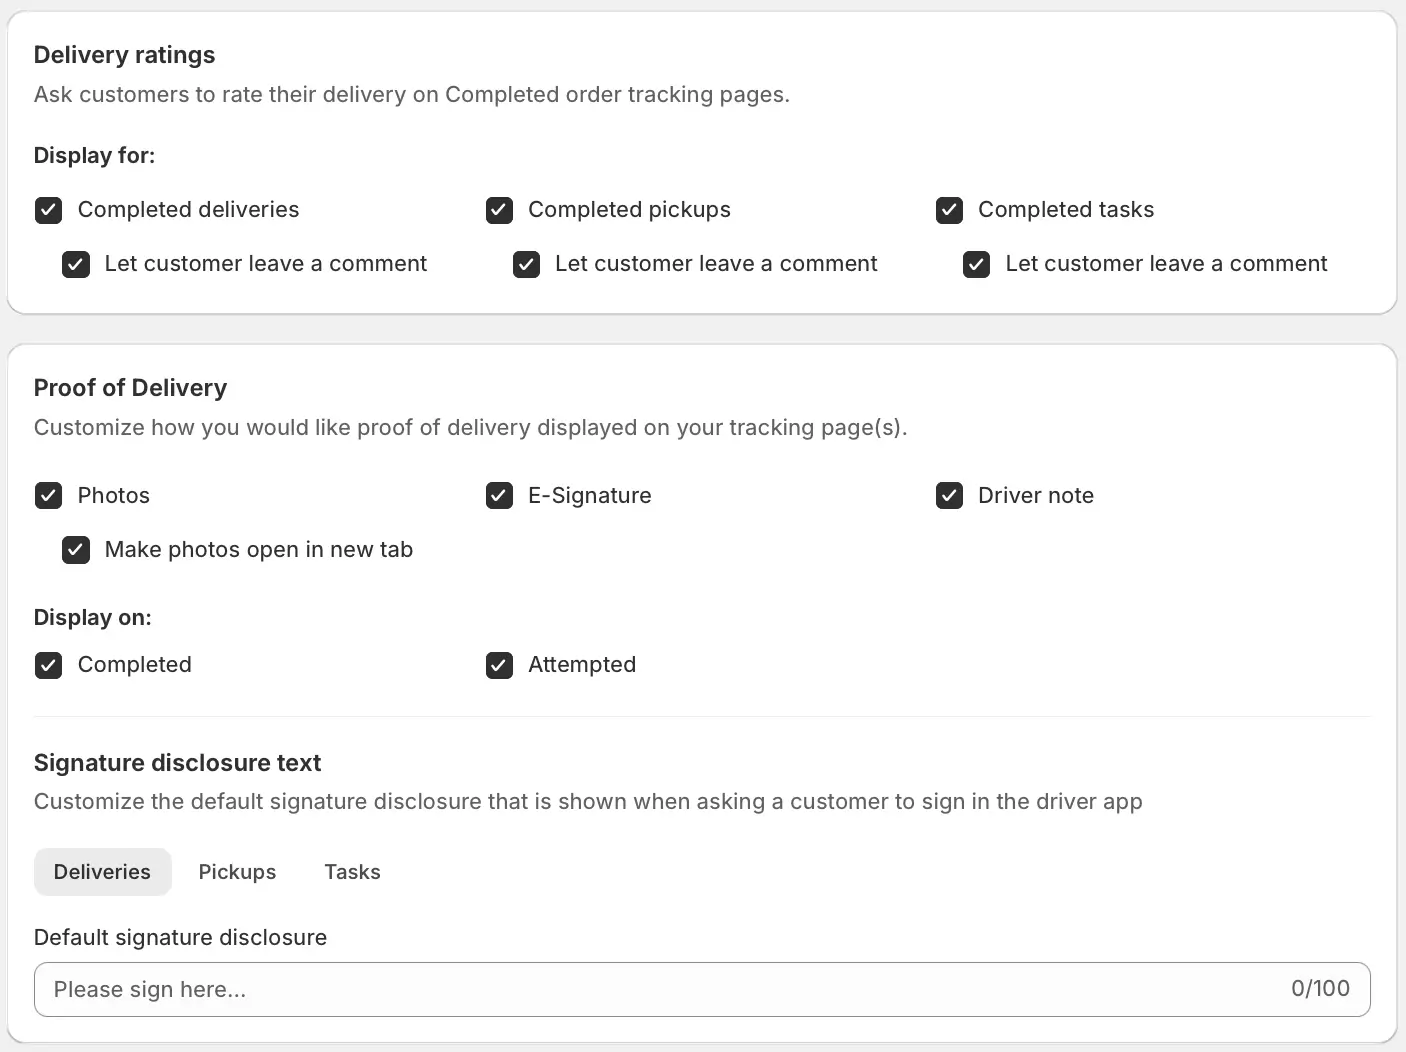
To automatically include PoD items on your customers' order tracking pages, navigate to your EasyRoutes Settings > Order tracking tab, and ensure Proof of delivery is checked from the Display subsection of the Tracking page options listed there:
Speaking of order tracking pages...
Order Tracking Pages
EasyRoutes' tracking pages can display many of the data types we've enabled and configured above, providing your customers with all of their delivery details in one convenient location that updates in real time as routes progress. To configure tracking pages for your orders, access your EasyRoutes Settings > Order Tracking tab and follow along below.
At the top of the page, from the Preview tracking page panel, you can select any stop type and available delivery status (Preparing for Delivery, Out for Delivery, etc.)and click the Preview button to see what your tracking page will look like when an order matches that state:
Next, you'll find the Branding section, which allows you to configure the page's background colour, or to upload a custom image, much like packing lists discussed above:
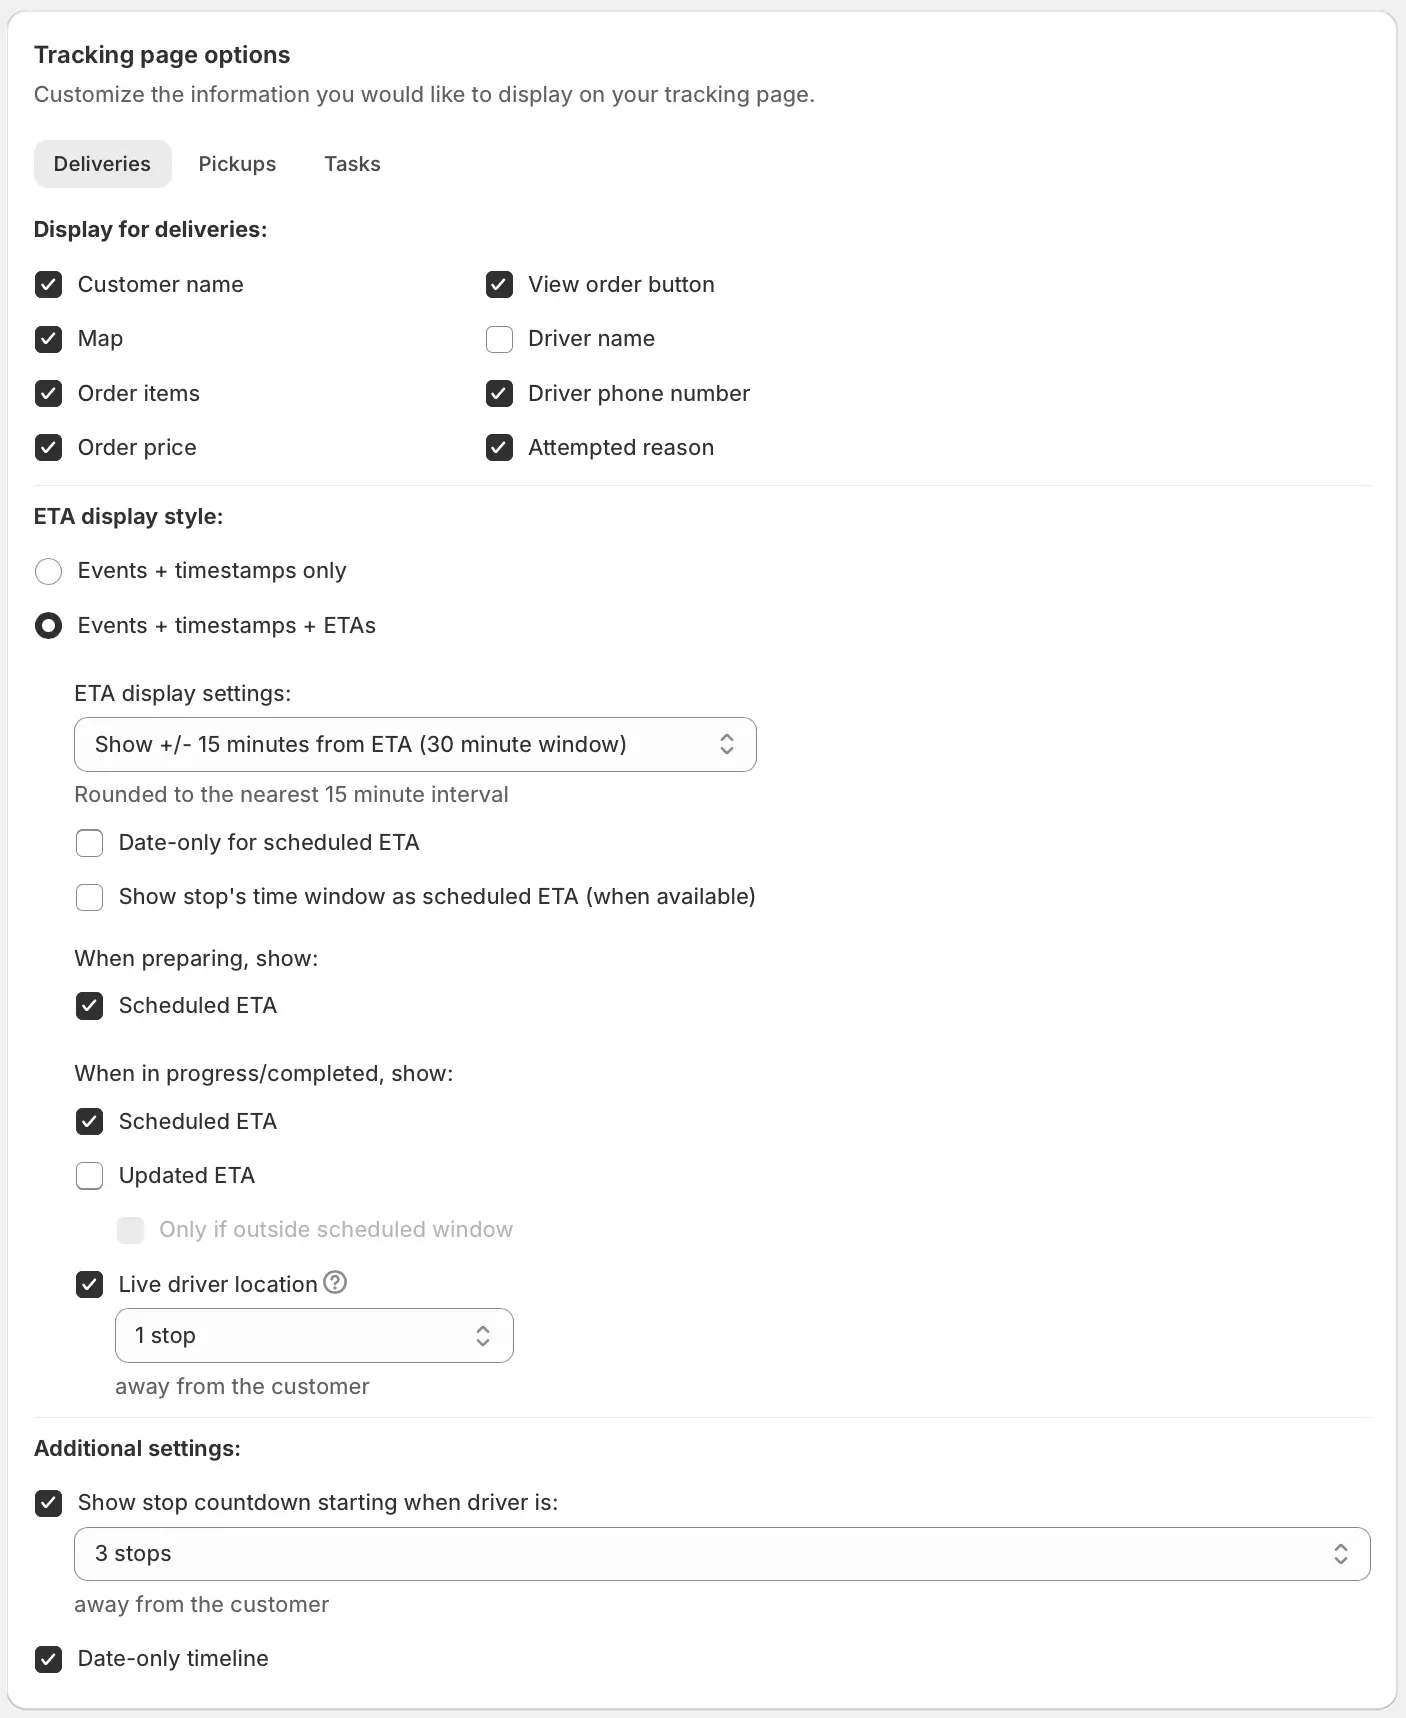
Below that, in the Tracking page options section, you'll find many of the settings used to fine-tune what's included on your tracking pages - these can be configured individually for stops marked as Deliveries, Pickups, and Tasks by navigating through the three tabs found at the top of this section:
There's many different ways this section can be configured to suit your specific delivery workflows - for example, you may wish to share a precise (more narrow) ETA window with your customers, or you may wish to share a less precise (more broad) window to give your drivers extra wiggle room when delivering routes. For a full breakdown on how these settings will impact your customers' tracking pages, see this support article.
Note: In order to share a real-time driver location pin to your customers, ensure Live driver tracking when stop is next is enabled from the panel shown above, as well as the following setting from your EasyRoutes Settings > Driver settings tab:
The next two sections allow you to customize display behaviour for customer ratings & proof of delivery items on tracking pages:
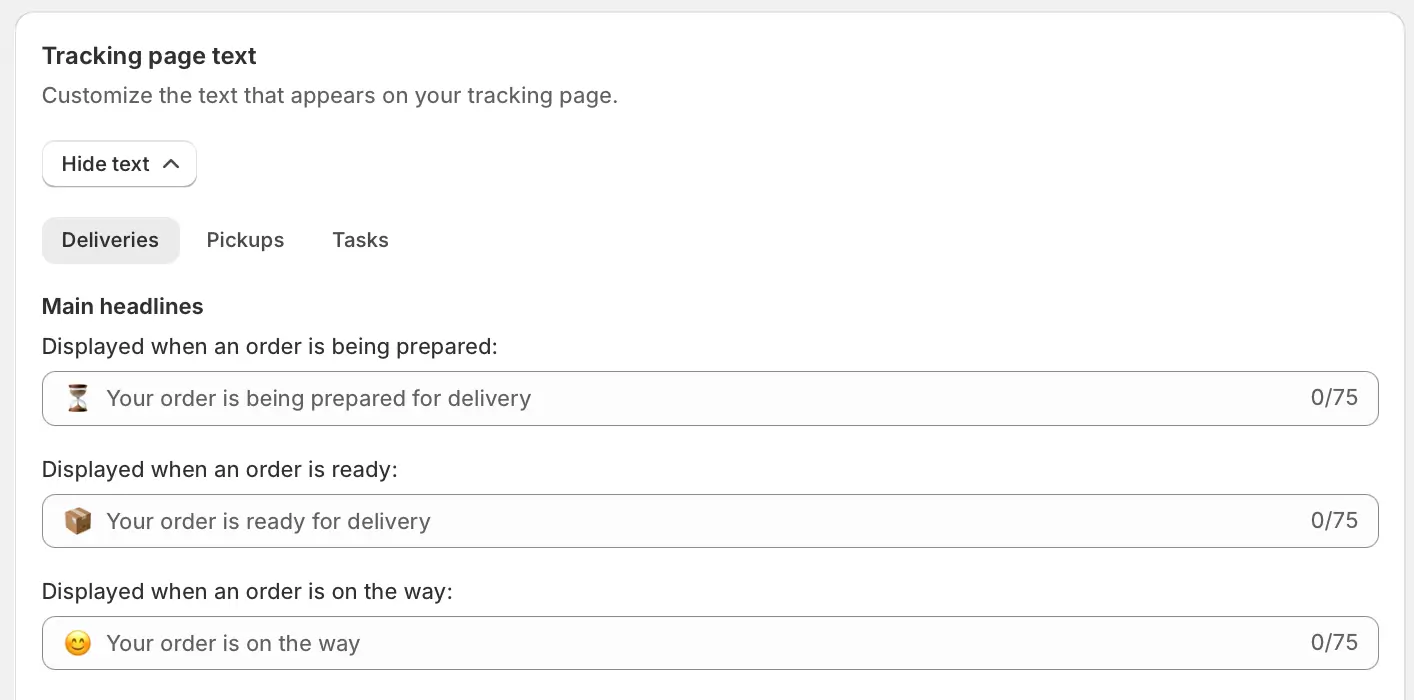
The final section, Tracking page text, allows you to customize the headlines and label text that will be used to describe the variables included in your tracking pages, particularly useful for translating these strings to languages other than English. These labels and headlines can also be configured individually for stops marked as Deliveries, Pickups, and Tasks by navigating through the three tabs found at the top of this section:
Once orders have been added to a route, tracking page links can be copied or directly viewed from the Actions menu on the right-hand side of any order on the Route page:
Further information
Still have questions about communicating with your customers via EasyRoutes? Search the EasyRoutes support portal for answers on all things EasyRoutes at any time; check out the Tracking Pages & Notifications section of the support portal for more specifics on the topics discussed above; or reach out to the Roundtrip support team if we can help point you in the right direction for any other questions or concerns. Happy delivering!
Written by: Joe Snyder
About EasyRoutes
EasyRoutes is the AI-native delivery operations platform trusted by 5,000+ businesses across 75+ countries. Plan routes in seconds, dispatch drivers automatically, and delight your customers — from Shopify or any order source. Experience delivery operations that run themselves. Rated 4.8 stars and certified Built for Shopify.