
Welcome to EasyRoutes 101! In this article, we’ll show you how to connect to the EasyRoutes API, use it to get a new store’s first routes on the road, and hook it up to your other systems so they stay in sync with every delivery.
What the API does
The EasyRoutes API is a REST API that lets your own code do the route planning work you’d normally do in the app. With it, you can:
- Import stops from any outside source, such as another storefront, a wholesale portal or phone orders
- Create routes, add stops to them and optimize them using your saved route options
- Assign drivers and dispatch routes to the EasyRoutes Delivery Driver app
- Read route and stop data for reporting
- Subscribe to webhooks, so your systems hear about route and stop changes in real time
The API works the same way on EasyRoutes for Shopify and EasyRoutes for Web. This guide uses EasyRoutes for Shopify, where your Shopify orders already sync automatically. On Shopify, the API is most useful for orders that come from somewhere else, for building routes from your Shopify orders on a schedule, and for anything else you want to automate around your routes.
If you’d rather not write code, Zapier covers many of the same jobs. See EasyRoutes 101: Get Started with Zapier for that route. The rest of this guide assumes you have a developer (or are one) and a server that can make HTTPS requests.
Before you start
You’ll need:
- A paid EasyRoutes plan. The Routes API and Webhooks API are included on Standard, Premium and Enterprise. See pricing for details.
- Admin access to EasyRoutes settings.
- A test store, if you can. EasyRoutes doesn’t have a separate sandbox, so we recommend a development store (or a separate EasyRoutes for Web workspace) with sample orders. Use your own team’s contact details on test stops so any customer notifications reach you, not real customers. When everything works, swap in your production keys and webhook URLs.
Get your API keys
1) Open the API settings
In EasyRoutes, navigate to your EasyRoutes Settings > API tab.
2) Add a developer contact and generate a key
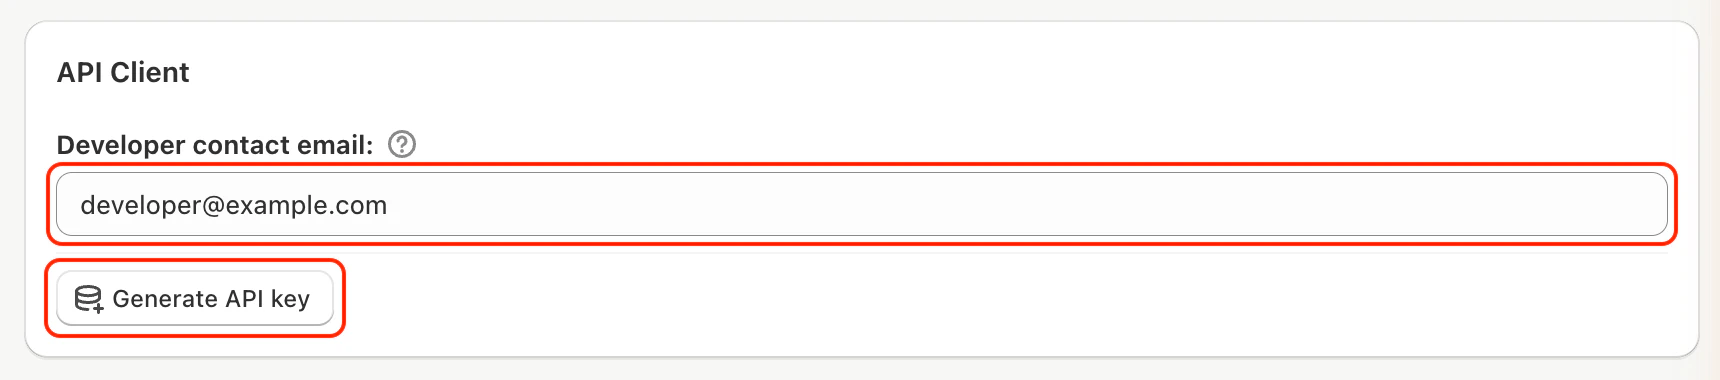
Enter a developer contact email, using an address your developer actually checks. Then click Generate API key:
3) Save your Secret Key somewhere safe
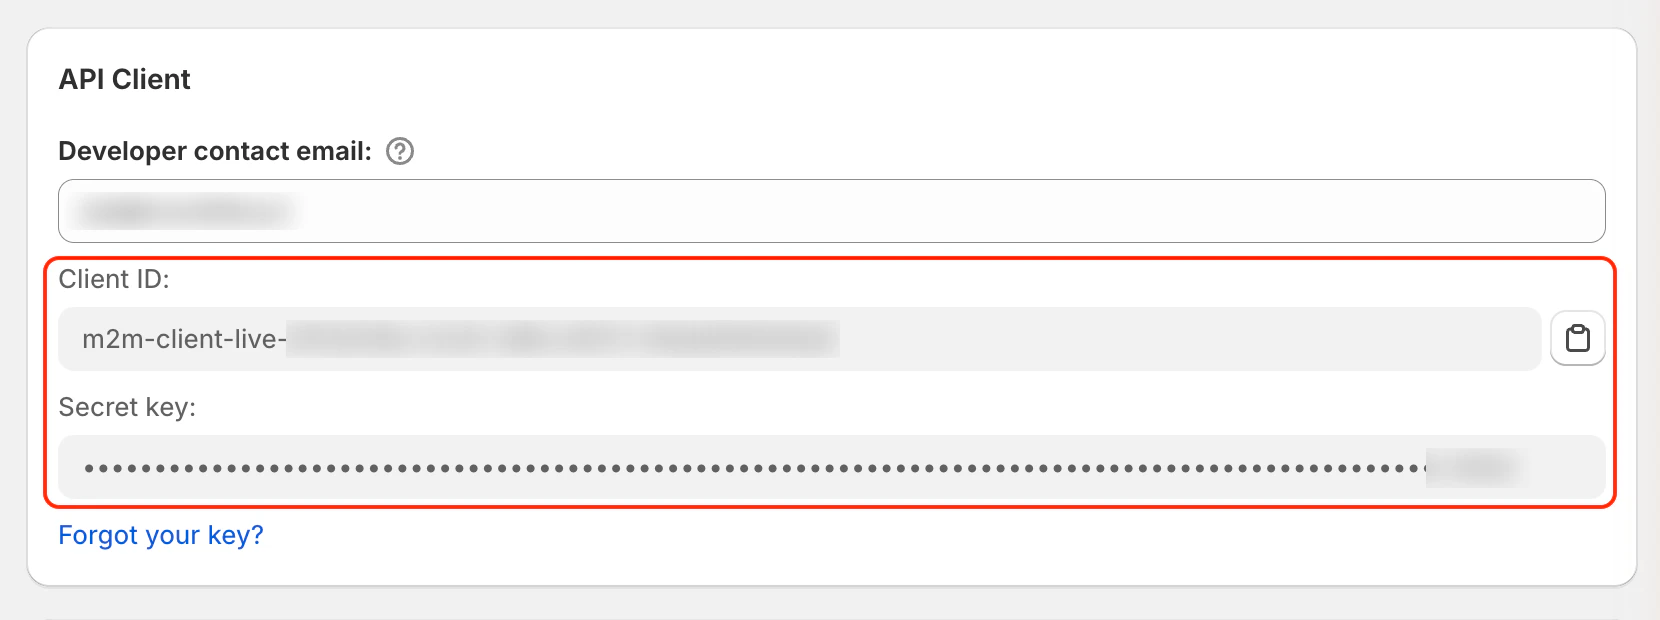
EasyRoutes shows you two values:
- Client ID, which identifies your account and stays visible in settings
- Secret Key, which is shown only once
Copy the Secret Key into a password manager or your server’s secrets store straight away. You can’t view it again later. Treat it like a password: never put it in front-end code or a shared document.
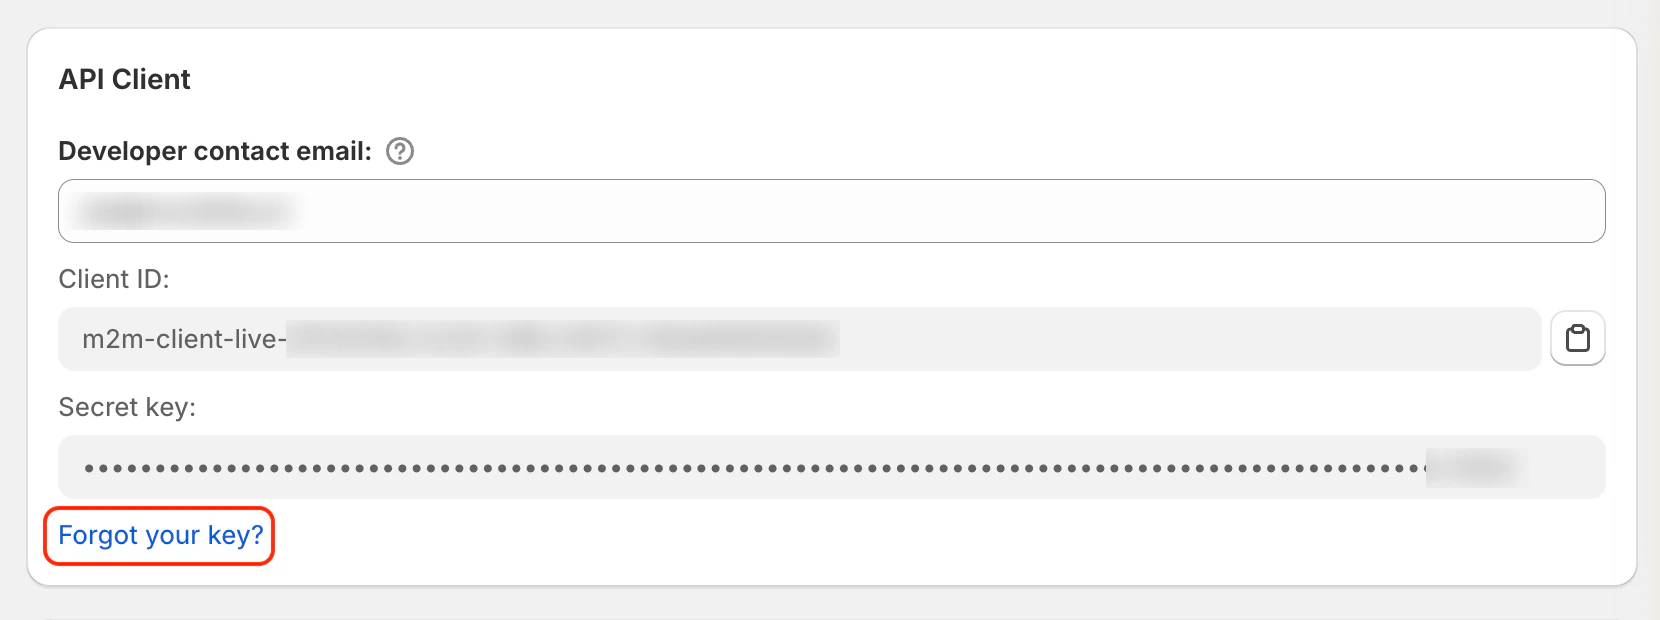
If a key is ever lost or exposed, click Forgot your key? on the same page to start a key rotation. While a rotation is in progress, both the old and new keys work, so you can update your server first, then click Finish rotation to retire the old key. You can also cancel a rotation, which discards the new key instead.
4) Request an access token
Your server exchanges the Client ID and Secret Key for an access token:
curl -X POST https://easyroutes.roundtrip.ai/api/2024-07/authenticate \
  -H "Content-Type: application/json" \
  -d '{"clientId": "YOUR_CLIENT_ID", "clientSecret": "YOUR_SECRET_KEY"}'
The response includes an accessToken and an expiresInSeconds value, usually one hour. Send the token as a Bearer token in the Authorization header of every other request. Cache it and request a fresh one before it expires, rather than authenticating on every call.
The 2024-07 in the URL is the API version. New fields and endpoints are added to it in a backwards-compatible way, and the API Changelog lists each addition.
Each API client can make 10 requests per second, with bursts of up to 120. A request over the limit gets a 429 Too Many Requests response with a Retry-After header, so wait that long before trying again. The Rate Limits guide explains the response headers that tell you how much of your allowance is left.
Set up a new store with the API
Here’s the path from an empty store to a dispatched route, all from code. It’s a good first project because each step shows up in the app, so you can check your work as you go.
1) Invite your drivers in EasyRoutes
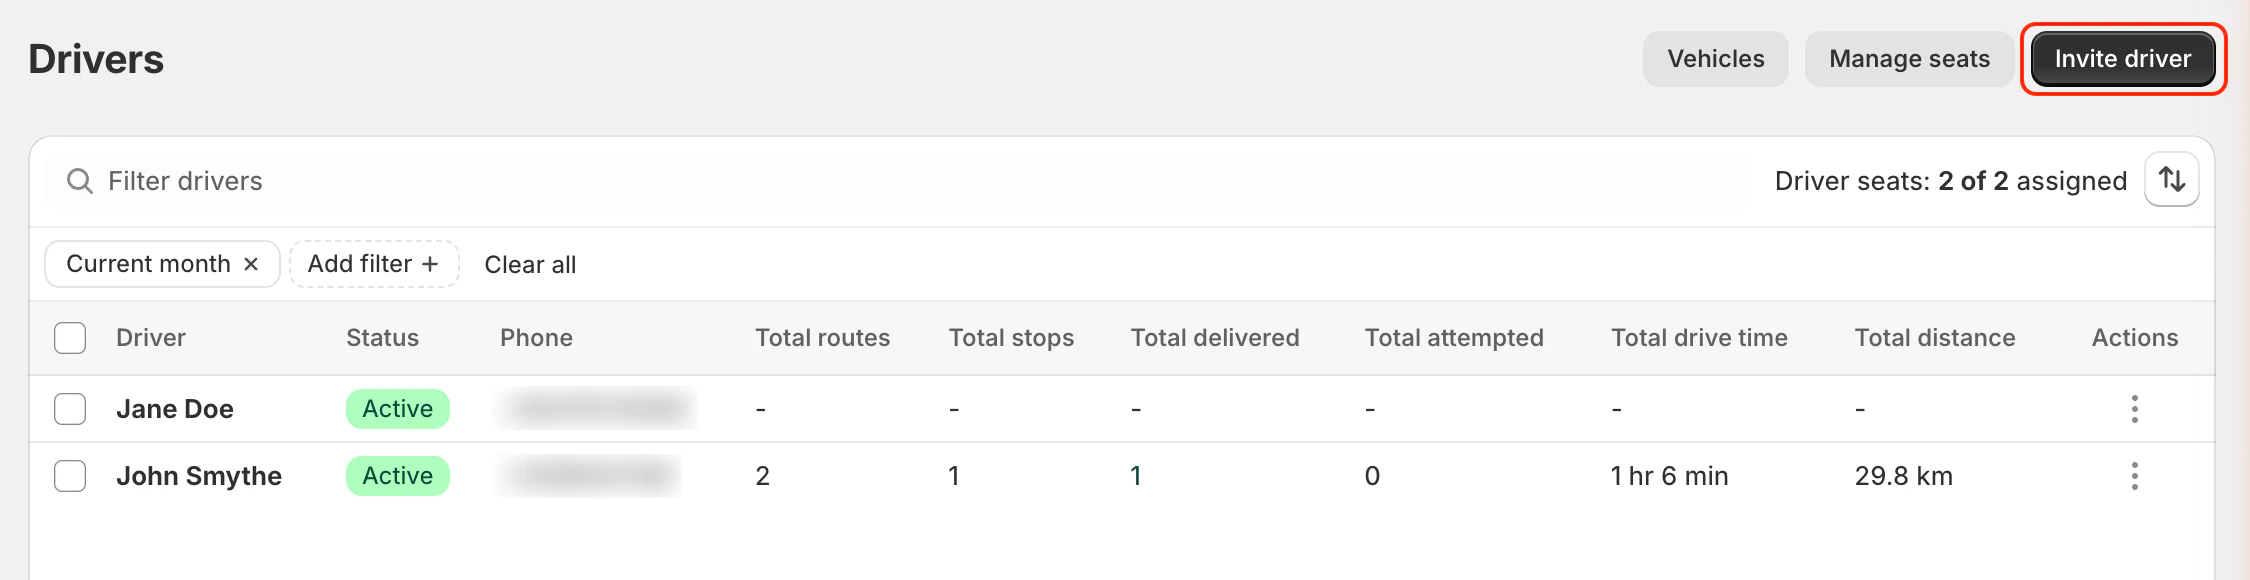
The API reads your drivers but doesn’t create them. Invite drivers from the Drivers & Vehicles page by clicking Invite driver, then activate them once they’ve signed up. EasyRoutes 101: Managing Drivers & Seats walks through this in detail.
Then call GET /drivers to get each driver’s ID (it starts with drv-). You’ll need it to assign routes.
2) Import your stops
Send stops to POST /stops/imports as a JSON list. Every field is optional, but most imports include an address, contact details and an order name:
curl -X POST https://easyroutes.roundtrip.ai/api/2024-07/stops/imports \
  -H "Authorization: Bearer YOUR_ACCESS_TOKEN" \
  -H "Content-Type: application/json" \
  -H "Idempotency-Key: 3f6c1e2a-8b4d-4c7e-9a21-5d0b7e9f4c13" \
  -d '[{
    "clientStopId": "WHOLESALE-1042",
    "orderName": "#W1042",
    "contact": {"firstName": "Jane", "lastName": "Doe", "phone": "+14165550123"},
    "address": {"address1": "123 Example Ave", "city": "Toronto", "provinceCode": "ON", "countryCode": "CA", "zip": "M4M 1A1"},
    "deliveryDate": {"year": 2026, "month": 10, "day": 16},
    "timeWindows": [{"start": {"hours": 9}, "end": {"hours": 12}}],
    "items": [{"name": "Sourdough loaf", "quantity": 2, "sku": "SD-01"}],
    "note": "Leave with the front desk"
  }]'
A few fields are worth setting from day one:
clientStopIdholds your own order or record ID, so you can match stops back to your system later.orderReferenceUrllinks the stop to the order in your other system. It must be an HTTPS URL.tags,attributesanddeliveryDatework with order filters, so imported stops can be filtered by tag, attribute or delivery date just like your Shopify orders.timeWindowsare used in route planning on the Premium and Enterprise plans. See Time Windows for how they work.
You can import up to 200 stops per request. The response returns each stop with an ID starting with ist-.
The Idempotency-Key header is optional, but we recommend it on anything that creates data, with a fresh UUID for each request. If a request times out and you retry with the same key, EasyRoutes won’t create the stops a second time.
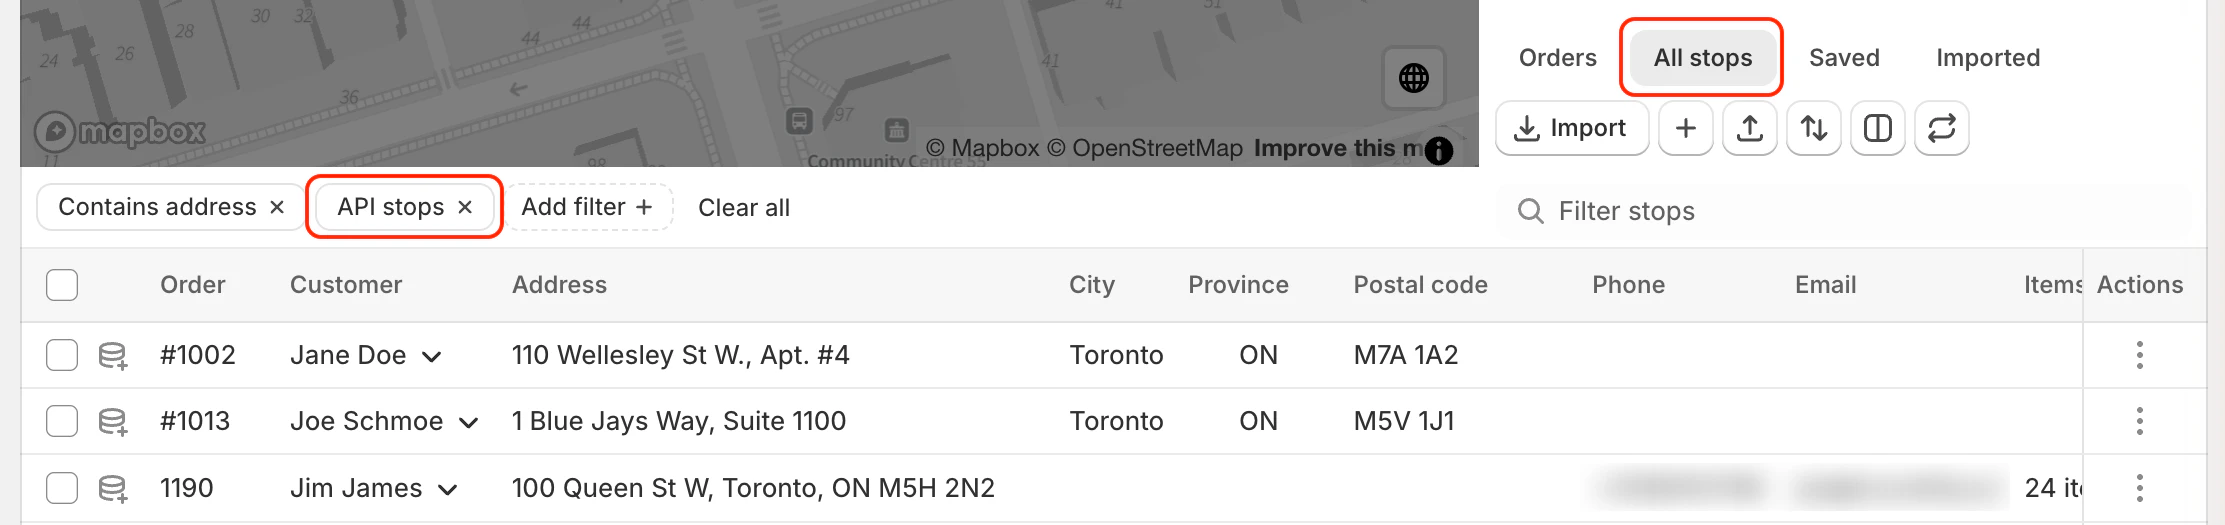
Your imported stops now appear on the Orders page, ready to route. Open the All stops tab and add the Source filter set to API stops to see just the ones you imported.
3) Create a route and add stops
Create an empty route with POST /routes. Only a start location is required, and you can add an end location if your drivers finish somewhere else:
curl -X POST https://easyroutes.roundtrip.ai/api/2024-07/routes \
  -H "Authorization: Bearer YOUR_ACCESS_TOKEN" \
  -H "Content-Type: application/json" \
  -d '{"start": {"address": {"address1": "500 Sample St", "city": "Toronto", "provinceCode": "ON", "countryCode": "CA", "zip": "M5M 1B1"}}}'
The response includes the new route’s ID (starting with rte-). Add your imported stops to it with POST /routes/{routeId}/stops, passing a list of {"importedStopId": "ist-…"} objects.
To route Shopify orders as well, you don’t need to import them first. Add them with POST /routes/{routeId}/shopify-orders, up to 200 at a time, passing a list of {"shopifyOrderId": "…", "itemSelection": "PREFER_UNFULFILLED"} objects. itemSelection decides which of the order’s items the stop delivers. Each stop takes its address, note and items from the order. If any order can’t be added, for example because it has no shipping address, none of them are, so check the error and send the batch again. See the release note for details.
4) Optimize the route
Adding stops doesn’t reorder the route. New stops are added to the end. When all your stops are in, call POST /routes/{routeId}/reoptimize with an empty JSON object ({}) as the body. EasyRoutes optimizes the route using its route options, which you can set in options when you create the route. EasyRoutes 101: Route Optimization & Route Options explains what each option does.
5) Assign a driver and dispatch
Assign the route with PUT /routes/{routeId}/driver and a body of {"driverId": "drv-…"}. Then call POST /routes/{routeId}/dispatch to send it to your driver’s EasyRoutes Delivery Driver app.
If the route includes Shopify orders, note that dispatching through the API doesn’t make the Shopify order updates you may have set up to happen on dispatch. To refresh the route’s orders from Shopify before it goes out, call POST /routes/{routeId}/resync-orders first.
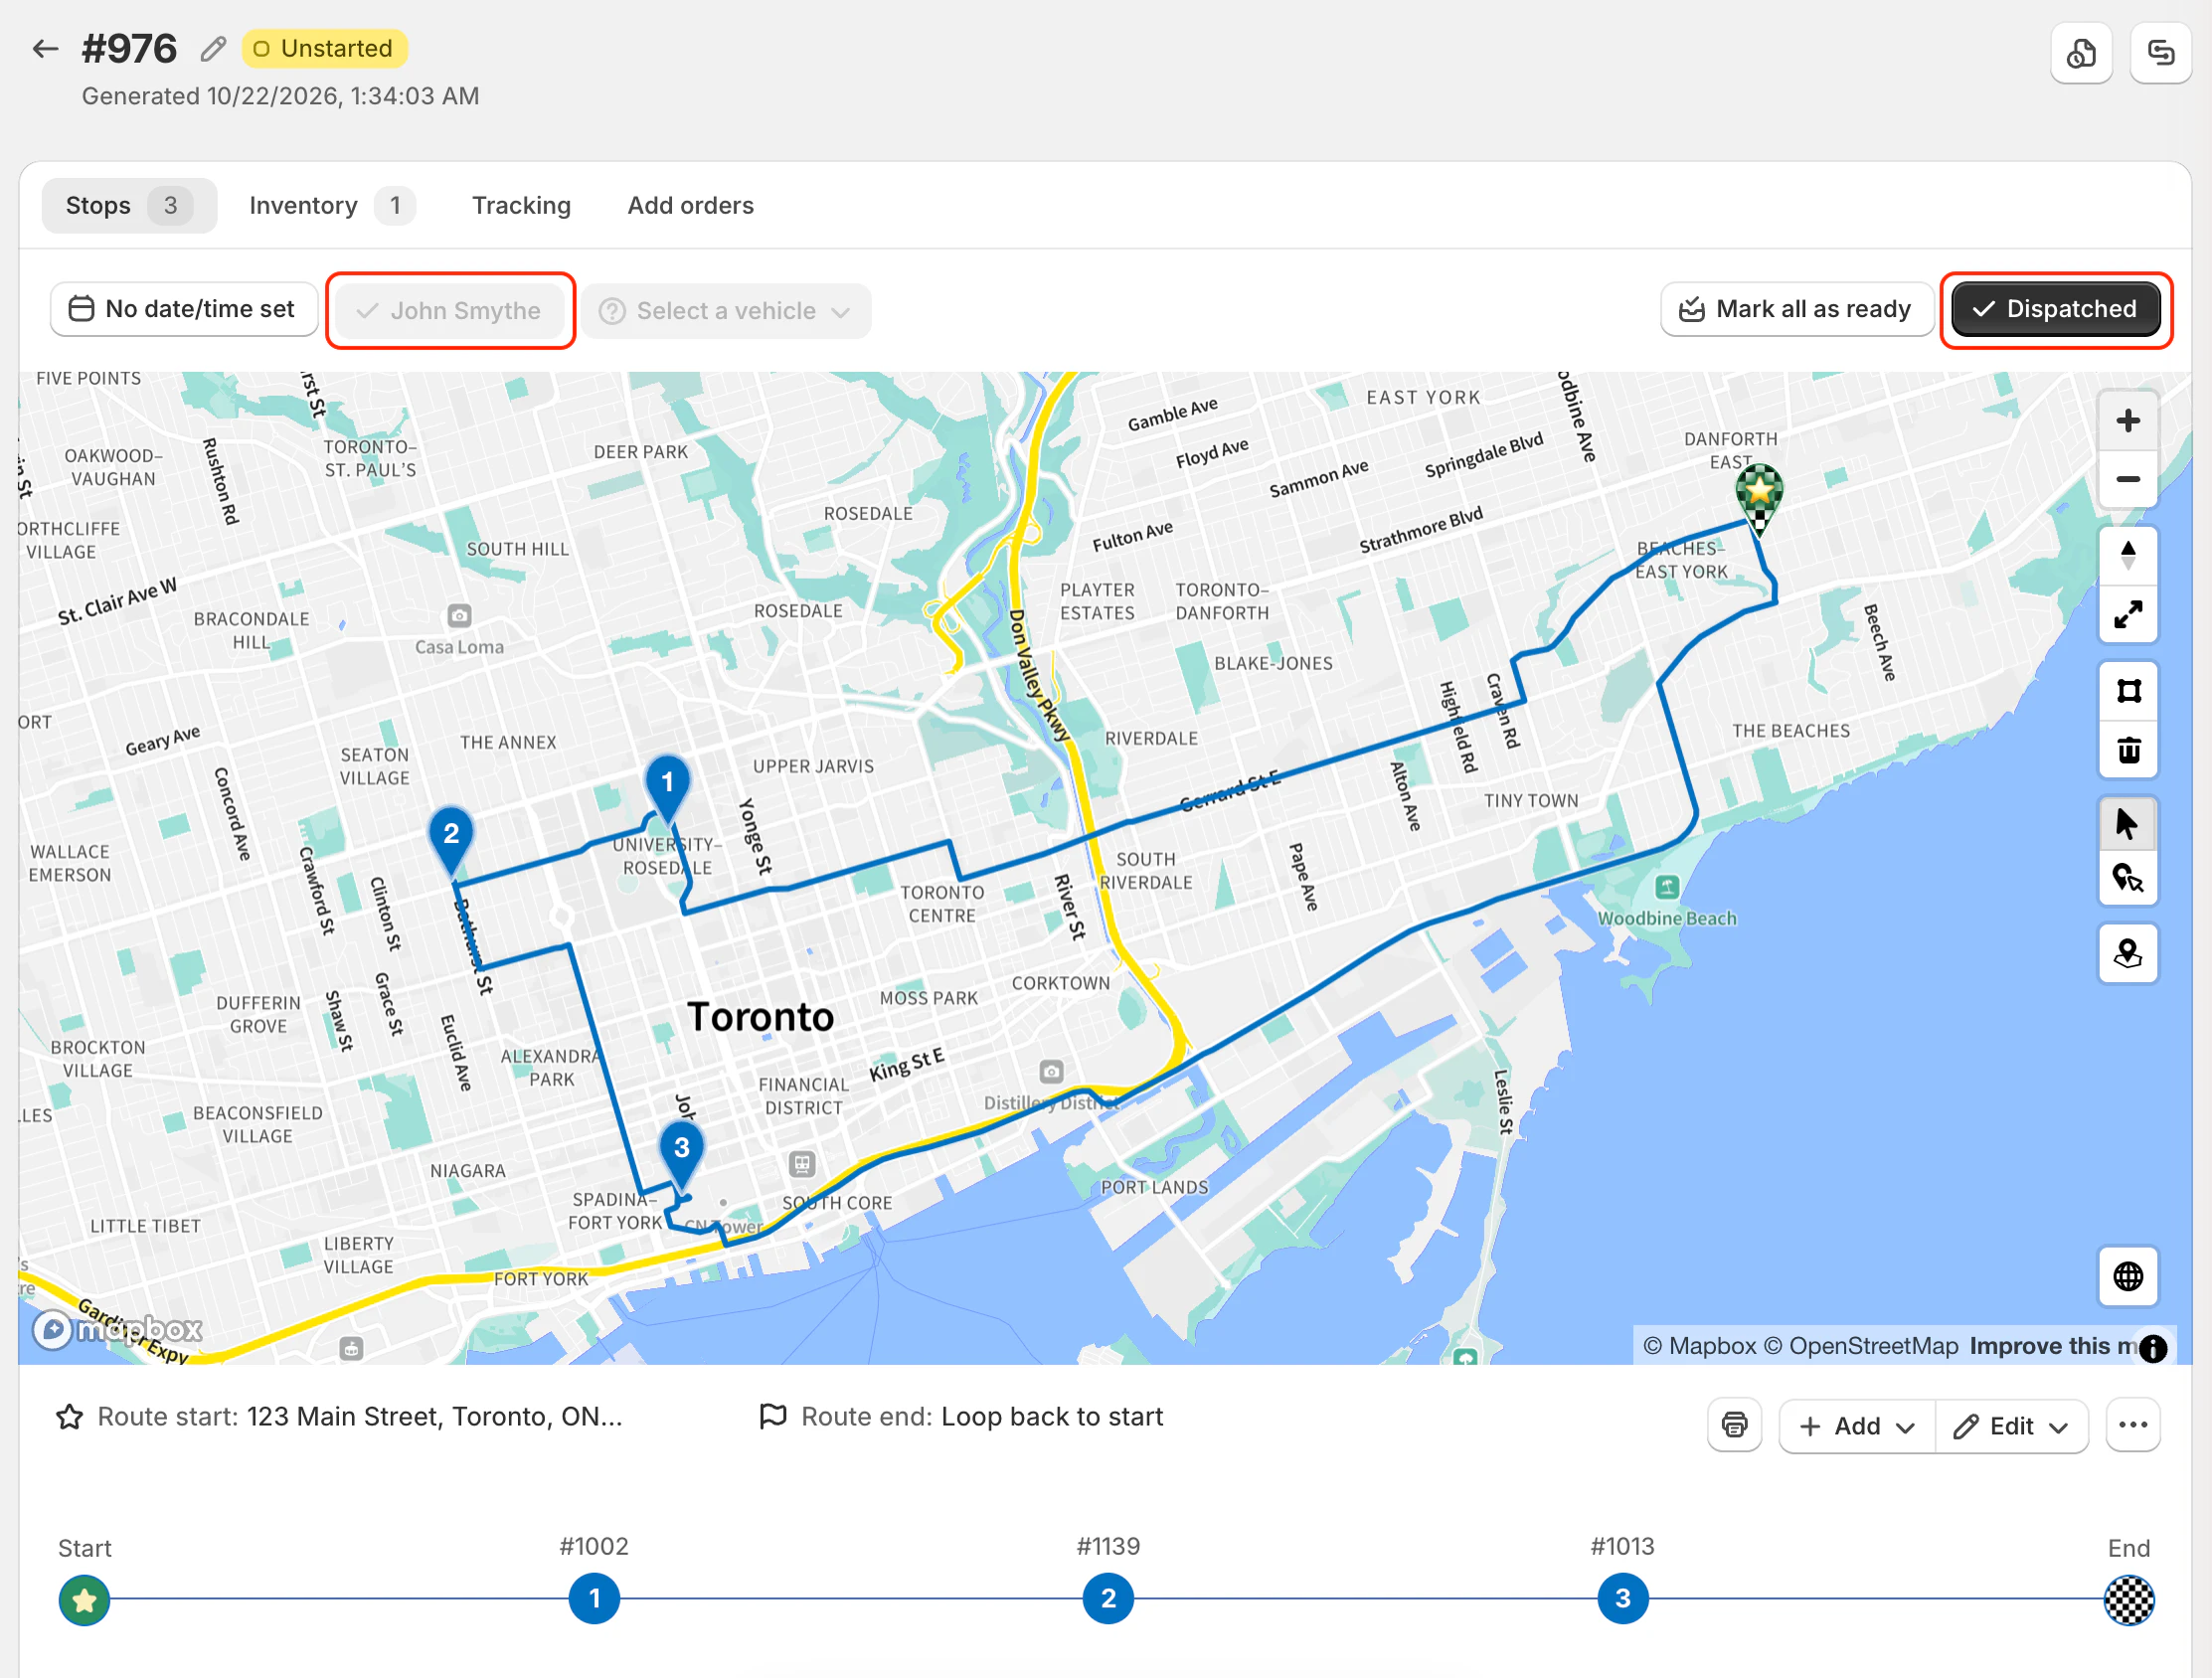
Open the route in EasyRoutes to check it. You should see your stops in optimized order, your driver assigned and the route marked as dispatched.
Updating stops and routes through the API can trigger your customer notifications if you have them switched on. That’s another reason to test with your own contact details first.
Connect your other systems
Once routes are flowing, the next job is usually keeping something else up to date: an order management system, a warehouse tool or a reporting sheet. Webhooks handle this. Instead of your system checking EasyRoutes over and over, EasyRoutes sends it a message the moment something changes.
1) Choose your events
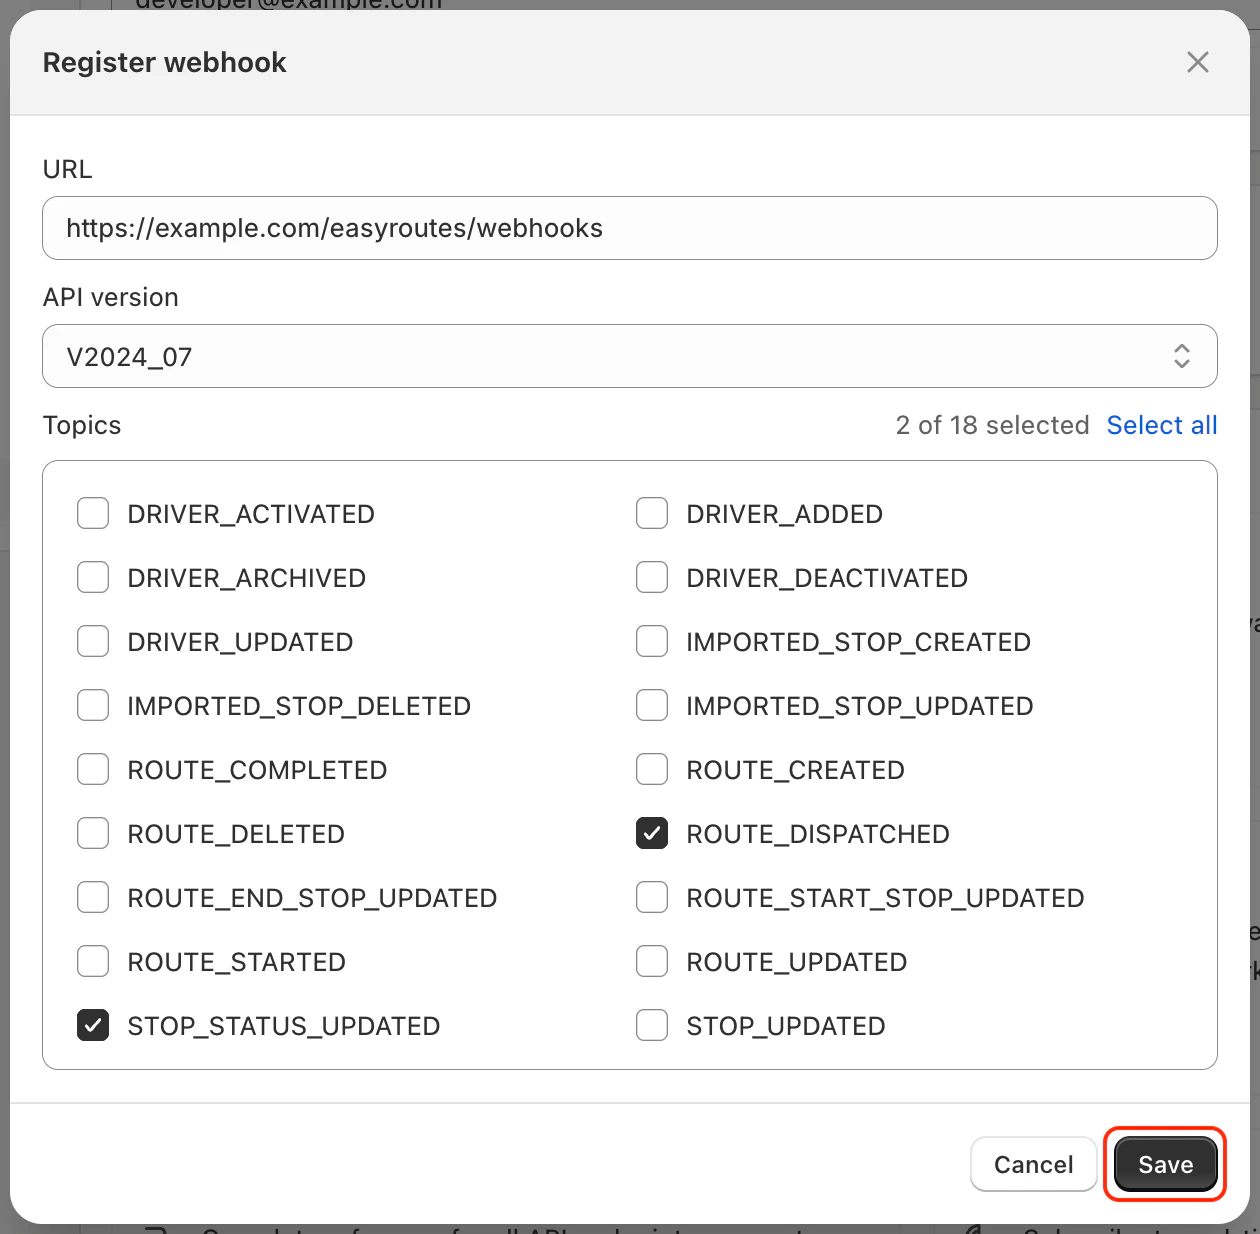
Each webhook subscribes to one or more topics. Popular ones include:
| Topic | When it fires |
|---|---|
ROUTE_DISPATCHED |
A route is sent to a driver |
ROUTE_STARTED, ROUTE_COMPLETED |
A driver starts or finishes a route |
STOP_STATUS_UPDATED |
A stop is delivered, attempted or otherwise updated |
IMPORTED_STOP_CREATED |
A new stop is imported |
There are also topics for route changes, driver changes and imported stop updates. The Webhooks Guide has the full list.
2) Register a webhook
In your EasyRoutes Settings > API tab, click Register webhook. Enter your endpoint’s HTTPS URL, choose an API version, select your topics and click Save. Each account can have up to five webhook subscriptions.
You can also register webhooks from code with POST /webhooks, passing a url and a list of topics. That’s handy if you set up many stores the same way.
3) Verify that each request comes from EasyRoutes
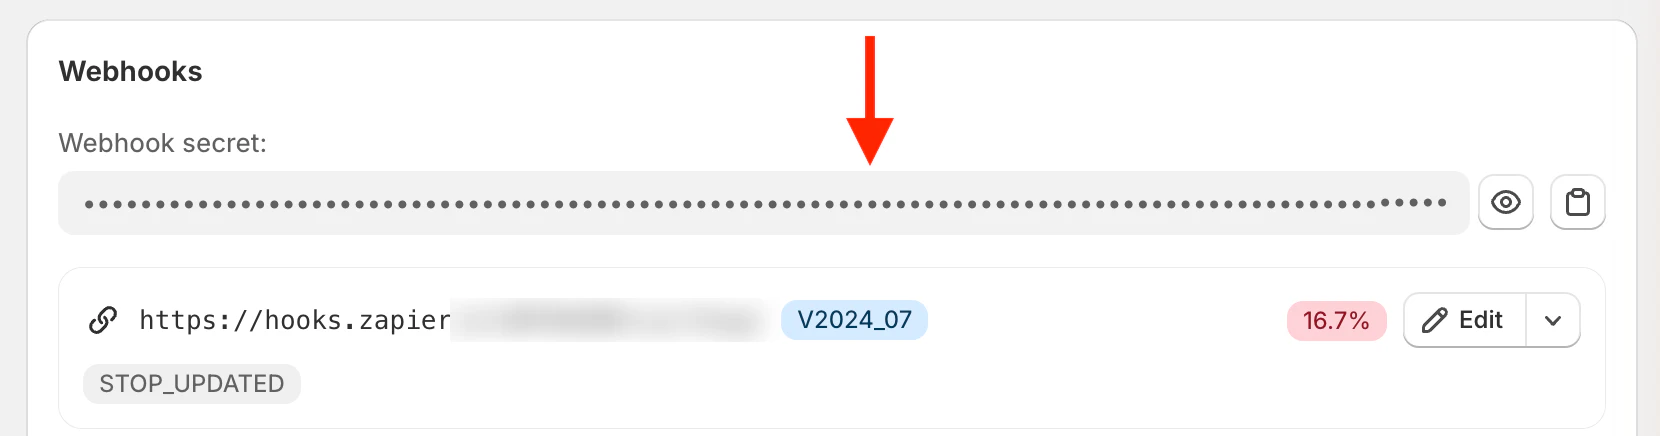
Registering your first webhook creates a Webhook secret, which you’ll find in your EasyRoutes Settings > API tab from then on. It’s separate from your API Secret Key.
Every webhook request includes an X-EasyRoutes-Hmac-Sha256 header. Your server should compute an HMAC-SHA256 of the raw request body using the Webhook secret, compare the result with that header, and reject any request that doesn’t match. The Webhooks Guide includes a working code sample.
4) Send a test event
Before you rely on real deliveries, check that your endpoint receives and verifies events. In your EasyRoutes Settings > API tab, click the arrow next to your webhook’s Edit button and choose Test. EasyRoutes sends an event with the topic TEST. If your endpoint returns a 2xx status, you’re ready.

5) Build for retries
A few habits keep an integration reliable:
- Respond fast. Return a 2xx status within 10 seconds, and do any slow work after you’ve responded.
- Expect retries. If your endpoint doesn’t respond, EasyRoutes retries up to 10 times over about five hours. Endpoints that keep failing can be deactivated, so keep an eye on them.
- Ignore duplicates. Each event has an
eventId. Store the ones you’ve processed and skip any repeats. - Match records with your own IDs. The
clientStopIdyou set on import ties each stop update back to the right order in your system.
Further information
Still have questions about the EasyRoutes API? Search the EasyRoutes support portal for answers at any time, start with How can I integrate with EasyRoutes? for an overview of your options, check out the EasyRoutes API Getting Started Guide, the full API Reference and the Webhooks Guide, or see how to connect EasyRoutes webhooks to Zapier for a no-code option. You can also reach out to the Roundtrip support team if we can help with anything else. Happy integrating!